How to connect relay with Arduino
Summary
Learn how to control high-power devices with your Arduino using a relay module with our detailed guide. Start with an introduction to relay modules and their importance. Understand the specifications and pin descriptions of a single-channel relay module. Gather the components needed and follow step-by-step instructions to make the connections. Dive into advanced coding examples with sensors to automate your projects. Explore various Arduino relay projects to inspire your creativity. Perfect for beginners and hobbyists, this guide will empower you to control more with your Arduino. Click now to master relay connections with Arduino!
INTRODUCTION:
Relays are critical components in electronics, acting as strong switches capable of regulating high-power devices effectively via low-power signals. When cleverly integrated into the versatile Arduino platform, relays become instrumental in empowering projects by allowing for the seamless control of a wide range of electrical devices—from lighting to powering motors and regulating various appliances—via the manipulation of a microcontroller.
Gaining a thorough grasp of not only how to physically connect a relay module to an Arduino board, but also how to program it properly, will definitely widen the scope of your do-it-yourself (DIY) projects.

Learn more - The power of Relays in electronics.
Furthermore, understanding how relays, the Arduino board, and custom programming work together opens up a world of possibilities for designing one-of-a-kind solutions that seamlessly integrate technology into daily life.
This knowledge allows you to transform traditional devices into sophisticated electronics that respond to cerain triggers or conditions, guaranteeing that your projects are not only functional but also intelligent and dynamic.
Overall, by delving deeper into the complexities of relay integration with the Arduino and honing your programming skills, you embark on a journey that fosters creativity, problem-solving, and technical expertise, ultimately enriching your DIY projects with useful skills and innovative applications.

RELAY MODULE ARDUINO CONNECTION:
A relay is an electrical switch that may be used to regulate devices and systems that operate at higher voltages. Module relays often use an electromagnet as their mechanism.
The relay module's input voltage is normally DC. However, the electrical load that a relay controls can be either AC or DC, as long as it is within the relay's design limits.
A relay module is available in a variety of input voltage levels, including 3.2V or 5V relay modules for low-power switching and 12 or 24V relay modules for heavy-duty applications.
The relay module information is often written on the device's surface for easy reference. This comprises the input voltage rating, switch voltage, and current limit.
Explore What is Relay and its uses in electronics.
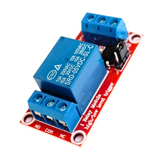
Single-Channel Relay Module Specifications :
- Supply voltage – 3.75V to 6V
- Quiescent current: 2mA
- Current when the relay is active: ~70mA
- Relay maximum contact voltage – 250VAC or 30VDC
- Relay maximum current – 10A

Single-Channel Relay Module Pin Description :

Components Needed :
To connect a relay module to an Arduino, you will need the following components:
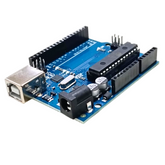
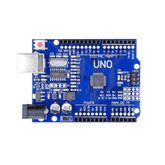
- Arduino board (e.g., Arduino Uno)
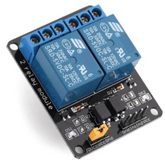
- Relay module (typically with one or more relays)
- Jumper wires
- External power supply (if and only if it is necessary for high-power devices)
Connection:
Step 1: Power the Relay Module
- Connect the Relay Module GND (ground) to the Arduino UNO GND (ground)
- Then Connect the VCC Pin of the Relay Module to the 5V in the UNO
Step 2: Control the pin
Connect the IN pin of the Relay Module to any one of the digital pin in the Arduino(eg.7 pin)
Step 3: Load Connections:
- Connect the common (COM) terminal of the relay to the power supply for the load.
- Connect the normally open (NO) terminal to one terminal of the load. The other terminal of the load should be connected to the ground or the other side of the power supply.
RELAY MODULE ARDUINO CODE The code below is an basic example to control the relay using the Arduino UNO.
Cpp:


const int relayPin = 7;  // Pin connected to the relay module


void setup() {

  pinMode(relayPin, OUTPUT);  // Set relay pin as an output

  digitalWrite(relayPin, LOW); // Initialize relay to off

}

void loop() {

  digitalWrite(relayPin, HIGH); // Turn relay on

  delay(2000);                  // Wait for 2 seconds

  digitalWrite(relayPin, LOW);  // Turn relay off

  delay(2000);                  // Wait for 2 seconds

}
Explanation of the code:
- relayPin: The digital pin attached to the relay module's IN pin.
- setup(): Initializes the relay pin as an output and switches the relay to an off state.
- loop(): Turns on and off the relay with a 2-second delay between each state transition.
Advanced Code with Sensor:
To add more functionality, you can integrate sensors and control the relay based on sensor readings. For example, using a temperature sensor to control a fan or heater:
Cpp :

#include


// Define the relay pin and sensor type/pin

const int relayPin = 7;

#define DHTPIN 2

#define DHTTYPE DHT11

DHT dht(DHTPIN, DHTTYPE);


void setup() {

  pinMode(relayPin, OUTPUT);

  dht.begin();

  Serial.begin(9600);

}


void loop() {

  float temperature = dht.readTemperature();

  Serial.print("Temperature: ");

  Serial.println(temperature);


  // Control relay based on temperature

  if (temperature > 25) {

    digitalWrite(relayPin, HIGH); // Turn on the relay

  } else {

    digitalWrite(relayPin, LOW); // Turn off the relay

  }


  delay(2000); // Wait for 2 seconds

}
This program reads the temperature and turns the relay on if the temperature exceeds 25°C, perfect for creating automated climate control systems.
ARDUINO RELAY PROJECTS:
Relays can be used in a wide range of projects, from simple to complex. Here are a few project ideas to inspire you:
Home Automation System:
- Control Multiple Appliances: Utilize several relays to manage various household devices such as lights, fans, and electronics.
- Sensor Integration: Incorporate sensors like motion detectors to automatically activate lights upon detecting movement, or temperature sensors to regulate heating and cooling systems. This adds intelligence to your home setup.
- Centralized Management: Develop a central control system using Arduino that communicates with all relays and sensors.
Remote Controlled Power Strip:
- Outlet-Specific Control: Design a power strip where each socket is linked to a separate relay, allowing you to individually control devices plugged into each socket.
- Remote Accessibility: Use a Wi-Fi module with Arduino to connect the power strip to your home network, enabling control via a smartphone app or web interface. This allows for remote operation of devices, offering convenience and energy savings.
- Safety Measures: Implement safety features such as overload protection and automated shutoff for devices left on for extended periods, enhancing both functionality and safety.
Automated Plant Watering System:
- Moisture Level Monitoring: Use soil moisture sensors to continuously check the moisture content in your plants’ soil. This ensures watering occurs only when necessary.
- Relay-Operated Water Pump: Connect a water pump to a relay controlled by Arduino.
- Customized Watering: Customize watering schedules based on plant type, soil conditions, and environmental factors.
Smart Door Lock:
- Lock Mechanism Control:Design a door lock mechanism controlled by a relay.
- Secure Entry System: Integrate an RFID reader or keypad with Arduino to provide secure access.
- Additional Security Features: Implement extra security features such as logging access attempts, sending notifications when the door is unlocked, and integrating with an alarm system for enhanced protection.
Alarm System:
- Motion Sensing: Use motion sensors to detect unauthorized movement in a specific area. When motion is detected and the sensor will sends a signal to Arduino.
- Siren Activation: Connect a siren or alarm to a relay controlled by Arduino. When motion is detected, the relay activates and will produce the sound like Siren, creating a loud alert to deter intruders.
- Lighting Integration: Integrate the alarm system with lights, using relays to turn on lights when motion is detected. This can further deter intruders and provide visual alerts.
Conclusion:
Connecting a relay module with an Arduino microcontroller offers a wide range of opportunities for managing power-intensive devices using low-current signals. By grasping the operation of relays, making accurate wire connections, and developing custom code, you can dive into numerous innovative projects that boost your automation capabilities.
Whether you aim to create an intelligent home setup, build a secure system, or explore electrical engineering innovations, the combination of Arduino and relay modules becomes an indispensable tool. This collaboration provides a durable, flexible, and effective solution tailored to your specific requirements.
Excerpt
Frequently Asked Questions
1. What is a relay module, and why do we utilize it with Arduino?
A relay module is an electrically controlled switch that enables low-power circuits to control higher-powered devices. Using a relay with an Arduino allows you to safely and efficiently manage appliances and systems that demand more power than the Arduino can directly handle.
2. How should I connect a relay module to an Arduino?
Connect the relay module's VCC and GND pins to 5V and GND pins on the Arduino, respectively. Connect the signal pin (IN) to a digital pin on the Arduino board. Connect the load to the relay's COM and NO (or NC) pins.
3. What is a relay and how does it work?
A relay is an electrically operated switch that allows you to control a high-voltage circuit with a low-voltage signal. When the relay coil is energized, it creates a magnetic field that closes the switch contacts, completing the circuit. This mechanism is crucial in applications like automation and remote control where safety and efficiency are paramount.
4. How to wire a relay module with Arduino?
To wire a relay module with Arduino, connect the relay's VCC to the Arduino's 5V, GND to GND, and the IN pin to a digital output pin (like pin 7). Connect your device to the relay's NO (Normally Open) or NC (Normally Closed) terminal. Ensure the circuit is powered appropriately for both the Arduino and the device being controlled.
5. Can Arduino control high-voltage devices safely?
Yes, Arduino can control high-voltage devices safely using relays. By isolating the low-voltage Arduino from the high-voltage circuit, relays minimize the risk of electrical shock. Always use properly rated relays and follow safety guidelines when working with high-voltage components.
6. What are NO and NC pins in a relay?
NO (Normally Open) and NC (Normally Closed) pins are terminal options on a relay. The NO pin connects to the common pin only when the relay is activated, while the NC pin maintains connection in its default state. This allows flexibility in controlling devices based on your project needs.
7. How to upload relay control code?
To upload relay control code to your Arduino, open the Arduino IDE and write your code to control the relay. Connect your Arduino to your computer via USB, select the correct board and port, then click the "Upload" button. Once the code is uploaded, your relay will respond according to your programming.
8. Can a relay be triggered with a button input?
Yes, a relay can be triggered using a button input. Connect the button to a digital pin on the Arduino. When the button is pressed, it sends a HIGH signal to the pin, activating the relay. This is a common method for controlling devices manually in DIY projects.
9. What type of relay is best for home automation?
Electromechanical relays (EMRs) or solid-state relays (SSRs) are ideal for home automation. EMRs are cost-effective and suitable for moderate loads, while SSRs offer faster switching and longer life. Choose based on the specific requirements of your home automation setup, such as load type and control method.
10. How to protect Arduino from relay back EMF?
To protect Arduino from relay back EMF, use a flyback diode across the relay coil. This diode allows the back EMF to dissipate safely when the relay is switched off, preventing voltage spikes that could damage the Arduino or other components in the circuit.
11. Can I use multiple relays in one project?
Yes, you can use multiple relays in one project. Simply connect each relay to separate digital pins on the Arduino. Ensure your power supply can handle the total load of all connected relays and devices. This setup is common in automation projects to control various outputs.
12. How to detect relay state in code?
To detect relay state in code, connect a feedback wire from the relay's COM or NO/NC pin to a digital input pin on the Arduino. Use a simple digitalRead() command in your code to check the relay's state, allowing you to understand whether the relay is activated or deactivated.


