How to Build a 3d Printer
Summary
Are you intrigued by the limitless possibilities of 3D printing technology? Our latest blog delves into the exciting world of 3D printing, showing you how to build your very own 3D printer right in the comfort of your home. From the step-by-step guide on assembling the machine to the essential materials needed, we've got you covered. Discover the fascinating uses of 3D printers and learn how to harness this revolutionary technology for your creative projects. Join us on this journey, and by the end, you'll be ready to dive into the world of 3D printing with confidence!
How to make 3d printer?
3D printers are becoming increasingly popular among makers and DIYers due to their low cost, ease of use, and versatility. Creating your own custom printer can be an incredibly rewarding project that allows you to create anything from figurines for fun or prototypes for work.
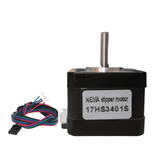
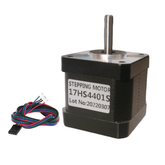
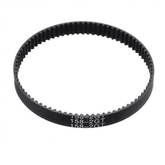
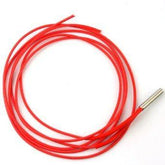
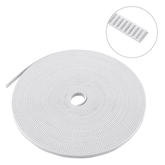
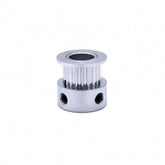
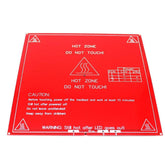
For those with mechanical aptitude, the basic parts list needed is surprisingly short: a hot end (the nozzle which melts plastic filament), accessories like bearings and screws; three stepper motors (one each for X-axis, Y-axis & Z-Axis) as well as extruder motor(s); a heated bed platform made either by PCB silk-screening method or having aluminium sheet/glass attached on wooden frame/base plate; some electrical components such as MOSFETS, diodes etc.; belt pulleys along with timing belts; lastly an Arduino board serving up commands sent through computer connected via USB cable.

With these components in hand assembling them into our first home-built 3D Printer is relatively straightforward although one must take care while making connections & setting parameters before actually giving it power ON! Its best practice to do test runs only after thoroughly understanding its working principles & safety protocols. Once assembled successfully beginner-level designs could easily be printed out without concern! And if further modifications are required expert advice should always be sought whenever necessary.
How to make a 3D printer at home?
Creating a 3D printer at home is easier than you think. Start by gathering the materials needed: an Arduino Uno board, stepper motors and drivers, wooden frames and other mechanical components. Once all the necessary parts have been gathered connect them according to instructions on how they should be wired together. Next download open-source software such as Marlin or Repetier Host that will control your printer's movements for printing objects from a Computer Aided Design (CAD) file onto any material of choice including plastic, metal or wood filament. Finally, complete assembly following detailed tutorials online which provide step-by-step instructions on connecting hardware with firmware enabling efficient communication between various components controlling motion precisely within millimeters accuracy producing high quality printed product in no time!
Gather Required Materials
- 3D Printer
- 3D Printing Filament
- Controller Board
- Stepper Motors/Drivers
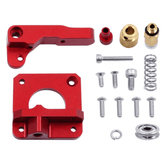
- Mechanical accessories
- Electronic accessories
Prepare Print Bed & Filament
Before taking on the task of creating a 3D printer at home, it is important to be properly prepared and have all the necessary elements ready. Firstly, you will need to select your desired bed material; commonly used materials are glass or aluminium beds covered with blue tape for adhesion when printing plastic-based filaments. For your filament requirements, there are numerous thermoplastic options available in both spooled 1.75mm and 2.85 mm sizes - ABS being one of the most popular choices due to its affordability as well as relatively low shrink rate during the cooling stage after the deposition process.
Printing different types can require further action like levelling the platform using screws that adjust metal plate height beneath the insulated print surface, which should help fine-tune any inconsistencies for optimal layer bonding prior to starting the job proper from a computer-controlled system. Following these steps will ensure smooth running operations.
Assemble 3D Printer Components
Assemble 3D printers are a great way to make quality and affordable items right at home. With so many components available on the market, it can be daunting for individuals who have never done this before. The basics of assembling your own 3D printer include selecting the appropriate parts such as stepper motors, an extruder head, a build plate or heat bed and a controller board.

It’s also important to ensure compatible power requirements in order for all components to run smoothly when connected together - you don't want any disappointment after investing time into making something special! After everything is selected and ready to go you will need to start piecing them together following instructions thoroughly while being patient with yourself during each step along the way. To get started here are some guidelines that every DIYer should keep in mind: understand which type of filament they wish to work with; know their budget limits; research online tutorials or videos if needed; set aside adequate workspace free from distractions; take regular breaks but stay focused throughout assembly process since one misstep could mean hours wasted undoing something wrongfully attached previously - better safe than sorry! Follow these simple tips/steps today and begin building fantastic projects using an assembled diy3dprinter kit within no time at all!
Calibrate and Test the Build
Creating a 3D printer at home can be an enjoyable and rewarding experience, as long as professional guidelines are followed. After the build has been completed to specification it is important to take time out for calibration and testing of the printer in order for optimum performance from your machine when printing parts or objects.
Calibration involves using methods such as auto-leveling where you will adjust height sensors that determine how accurately material flows during prints; this should result in improved dimensional accuracy which produces higher quality items being printed with far less effort involved. Furthermore, it's essential to test voltages between different components within your system so any irregularities may be identified quickly before significant damage occurs if they remain undetected over time - ultimately resulting in a longer lifespan of both printers along with materials used inside them!
Once these two crucial steps have been successfully carried out then there's no reason why one shouldn't make use of their new 3D printer straight away on various projects without worrying about costly repairs later down the line!
Install Software & Slicer Programs
Making a 3D printer at home has become much easier with the installation of software and slicer programs. The first step is to find a good program that suits your project needs. It's important to select one that offers support for multiple types of designs, including those included in professional CAD models as well as free-form shapes created by you or other hobbyists.
Once your choice is finalized, follow its instructions on how to install it properly onto the computer system hosting the printer’s motorized components and carriage systems. After successful installation ensure all connections are secure before starting up any printing process; otherwise, errors can occur during operation which could cause harm or damage parts within the device itself due care should always be taken here! With this done then move right ahead into utilizing ready-made ‘Slicers’ programs enabling users to control each build layer generated from their design files: allowing accurate part positioning, temperature management & quality ensures etc., –these are absolutely fundamental when undertaking 3D projects so take some extra time investigating what option will work best for intended use prior making decision!.
Finally, consider getting yourself user-friendly aids like mobile phone apps providing updates about supply levels status - number printed layers and many more available allow overseeing operations anytime wherever we go without requiring physical presence near the machine.
Printing with 3DPrinter
3D printing is a revolutionary technology that has skyrocketed in popularity over the last few years due to its ability to enable rapid prototyping and production of physical objects from digital designs. With today's 3DPrinter kits, anyone can create intricate shapes with precision at relatively low costs - making it perfect for both professional makers and amateur engineers alike.

It's no wonder why many businesses are turning towards this cost-effective alternative as more innovative products reach the market faster than ever before. Moreover, what makes these machines so attractive is their accessibility; all you really need is access to an internet connection or USB port in order to get started! Furthermore, being able to design your own unique parts or prototypes on demand gives professionals limitless possibilities when creating one-of-a-kind pieces that will set them apart from the competition – be it a jewellery designer looking for stainless steel components or architects building scale models of buildings they've designed.
Finally thanks largely in part to its technological advances within recent years, 3DPrinters have become invaluable tools across countless industries enabling users worldwide greater freedom while adding significant value along every step of the way—from product development through the finalization phase; giving plenty cause each day look forward advancements yet come!
Troubleshoot Printing Issues
Troubleshooting printing issues with a 3D printer can be an intimidating task. However, by following the steps below you should successfully resolve any problems that arise: First and foremost, make sure your printer is connected to the correct power source and all wiring is functioning correctly.
Check for software updates or patches that may have been published since you purchased your 3D Printer as these could remedy certain issues. Make sure there are no loose components inside of the machine which might interfere with its operation; if necessary remove them completely before restarting it again. If possible, check over every inch of filament for knots or other obstructions that could impede movement during printing periods - replace worn spools immediately if need be! Finally, test each level in print program settings one by one until something works (such as temperature levels etc.). Following these tips will help ensure successful prints while using 3DPrinters moving forward!
Maintenance of 3DPrinter
Maintaining your 3D Printer is essential for keeping it running optimally and ensuring a safe printing experience. Firstly, make sure to thoroughly inspect the printer before each use to ensure there are no loose screws or components; check that all wiring is secure as well. Adjust any settings or calibrations if needed.
Give special attention to moving parts like joints and rotating gears—check that they move smoothly without obstruction; adjust grease levels when necessary. Secondly, adhere strictly to guidelines on best practices while operating the machine in order to maintain overall safety such as wearing appropriate protective gear (gloves & goggles) during operation of the machine at all times.
Thirdly replace worn-out elements regularly such as nozzle tips which tend to wear easily with prolonged usage and/or bad filament material- this will help prevent blockages from forming due to excessive build-up inside hoses etc. along with optimizing's the performance of prints over time too! Lastly always follow the manufacturer’s instructions when cleaning your printer - wipe away dust particles from exterior surfaces using lint lint-free cloth dabbed into warm soapy water solution instead of harsh abrasives solutions materials near its electronic panels can be seriously damaged by leading potentially hazardous situations in worst cases scenarios!
3d printer uses what material ?
3D printing technology is revolutionizing the world of product development and manufacturing. A 3D printer uses a variety of materials to fabricate parts, such as plastic-based filament (such as PLA or ABS), metal powders like aluminum or titanium, special composite resins for dentistry applications, biocompatible polymers for medical implants—even edible plant starch! Each material has its own unique properties that can be used in various ways depending on what you are trying to create.

With careful selection and use of these varying raw materials your project can come out just right with professional results every time - no matter if it's small scale prototyping projects at home or commercial production runs in factories. The possibilities offered by using different kinds of specially formulated filaments give hobbyists and professionals alike endless creative opportunities with their projects allowing them access to technologies previously available only through expensive industrial assembly lines.3d printers have opened up an entirely new realm where dreams become reality faster than ever before!
read more : 3D Printing Basics: A Beginner's Guide
Conclusion
Building a 3D printer at home is an exciting and rewarding endeavor. We've explored the essential steps, from selecting the right components to assembling and calibrating your printer. Additionally, we've delved into the various materials used in 3D printing, showcasing its versatility across a multitude of applications.
Now that you've unlocked the world of 3D printing, the possibilities are limitless. Whether you're crafting prototypes, custom designs, or art pieces, your DIY 3D printer empowers your creativity.
If you appreciate our work don't forget to share this post and leave your opinion in the comment box.
Please do check out other blog posts about Popular electronics
Make sure you check out our wide range of products and collections (we offer some exciting deals!)
Frequently Asked Questions
1. How much does a 3D printer cost?
A do-it-yourself 3D printer in India can be quite a cost-effective purchase. With prices ranging from around 10,000 rupees for entry-level printers up to over 1 lakh for large industrial-grade machines, there's something out there that will suit everyone’s budget. Depending on the purpose of your printer and what you need it to produce - items such as toys & figurines or professional engineering components - then its important to consider size, resolution and power requirements before making any decisions about purchasing a specific model. It is also worth factoring in additional costs such as materials used and repairs if anything goes wrong during usage; this can ensure that they keep their DIY 3D printing project running smoothly!
2. How to use 3d printer?
Using a 3D printer is becoming increasingly popular among professionals for creating high-quality and innovative designs. With the right knowledge, you can produce intricate forms and models at lightning speed. To start using your DIY 3D Printer, begin by reading up on the latest technologies available to ensure that it meets all safety standards, as well as legal requirements if applicable in your jurisdiction. Once done with this crucial step, next comes manipulating shapes from graphical representation into real structures of objects using CAD software - Allowing printers to reproduce them physically accurately without any flaws or errors! Lastly familiarize yourself with different types of materials used i n3d printing such updating slicing settings for tolerances and layer thicknesses based upon what material type being used; following these tips will guarantee professional results every time when you use a DIY 3D printer.
3. What are two characteristics of the hotend nozzle on a 3d printer?
The hotend nozzle on a 3D printer is one of the most important components. It consists of two primary characteristics that play an integral part in successful printing: temperature compatibility and material selection. Temperature compatibility refers to its ability to reach high temperatures without melting or becoming damaged, allowing for more precise control over filament extrusion speed and layer quality throughout the print process. Material selection enables users to choose from a wide range of compatible filaments – including PLA, ABS, PETG and Wood Fill - offering greater flexibility when creating complex designs with detailed textures. This makes it possible to produce prints with excellent dimensional accuracy down into small details often otherwise impossible using traditional manufacturing processes.
4. What components are needed to build a 3D printer?
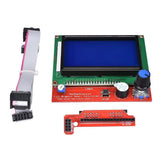
To build a 3D printer, you’ll need a frame (often aluminum or steel), stepper motors, a control board, a power supply, a hotend, a heated bed, and filament. Don’t forget cables and connectors, as well as a display and cooling fans for optimal performance. Each component plays a crucial role in ensuring your printer runs effectively.
5. How much does it cost to build a 3D printer at home?
The cost to build a 3D printer at home varies significantly, typically ranging from $200 to $800. This depends on the quality of components and features you choose. Budget options can be found, but investing in better parts often leads to improved print quality and durability.
6. Can Arduino be used in a DIY 3D printer?
Yes, Arduino is commonly used in DIY 3D printers as a control board. It allows for flexibility and customization in controlling the printer's functions. Many popular printer models use an Arduino-based board, making it a favorite among hobbyists and makers for prototyping and experimentation.
7. What are the steps to assemble a 3D printer?
To assemble a 3D printer, start by building the frame. Next, install the motors and the print bed. Connect the wiring to the control board, followed by the hotend and thermistor. Once everything is connected, calibrate the printer and perform a test print. Regular maintenance checks ensure optimal performance.
8. How can I troubleshoot print quality issues?
To troubleshoot print quality issues, first check for proper bed leveling. Ensure your nozzle is clean and not clogged. Adjust the temperature settings for the filament being used and inspect the filament quality. Lastly, examine the slicing settings in your 3D printing software for any errors that may affect print output.


