How do I Power My Raspberry Pi
Summary
Are you looking for a way to power your Raspberry Pi? If the answer is Yes! then check out this blog which takes you a closer look at the different power options available for your Raspberry Pi, and helps you determine which one is best for your particular project. Whether you're a beginner or an experienced Pi user, you'll find plenty of useful information to help you power up your Pi and get started on your next project.
Introduction
Hello! Welcome to this article. If you recently bought a Raspberry Pi and trying to figure out how to power it on? Which all different connectors on the board can be used for powering or can we use GPIO for powering the RPi? Can we supply extra current or voltage than rated? then this is the right blog for you. Here we will answer all these questions and a lot more by looking at different ways to power Raspberry pi. So stay tuned and let's get started!
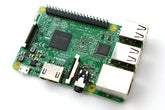
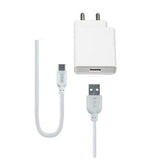
Raspberry Pi power is an important factor for anyone interested in tinkering with the system. Powering a Raspberry Pi can be done several ways, but some offer more convenience than others. The most obvious solution is to use a USB cable connected to your laptop or PC; however, this involves being tethered to one location while you work on your project.
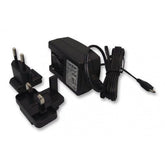
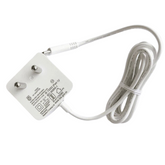
An alternative approach would be using wall adapters and micro-USB cables which provide better portability since they are powered by standard AC outlets instead of requiring access to an active computer at all times. Another popular option is powering it via PoE (Power over Ethernet); presuming that has been built into the Raspberry Pi setup though hardware add-ons like HATs or cape boards as needed before making any connections from upstream devices such as switches or routers could prove beneficial here too onwards. All these aspects need careful consideration when looking at how best handle getting juice up for those innovative projects!

Different modes to Power Raspberry Pi
1. Using USB connector on RPI Board
This is the recommended and most commonly used way to power the Raspberry Pi.
2. Micro USB
You can use a Micro USB type cable to give power supply to the board. This connector is used on older versions of RPi.
3. TYPE-C
TYPE-C connector is used on the latest versions of RPI i.e models 4 and 400. The specialty of type C compared to micro USB is that it is a reversible connector ( can be connected in any orientation) and can be used for faster data transfer and powering the RPi.
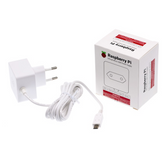
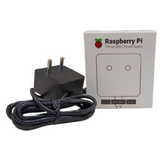
For best performance and stable supply use the official Raspberry pi power adapter from our robocraze store for powering Rpi 4 or 400. It gives a stable 5V and 3 A to the board.

Make sure you provide the recommended power supply as provided in the below table for different Rpi models.
|
Family |
Model |
Voltage |
Recommended Current |
Connector |
|
Raspberry Pi |
A, A+ |
5 V |
700 mA |
Micro USB |
|
Raspberry Pi B+, Rasberry Pi 2 B |
B |
5 V |
1.8 A |
|
|
Raspberry Pi Zero |
Zero, W/WH,2W |
5 V |
1.2 A |
|
|
Raspberry Pi 3 |
A+,B, B+ |
5 V |
2.5 A |
|
|
Raspberry Pi 4 |
B,400 |
5 V |
3.0 A |
USB C |
|
Raspberry Pi Pico |
1-8 - 5.5 V |
- |
Micro USB |
2. Using onboard GPIO Pins
Yes, you can use onboard 5V and GND pins for powering the Rpi. PINs 2 and 4 correspond to 5V. PIN 6 is the ground pin. Connect the PSU power wires accordingly to power the RPi. Note that you would need a stable 5V and 3 A power supply (in the case of Rpi 4) since there is no protection circuit added in case of power fluctuations

3. Power over Ethernet (PoE)
There is one more way through which you can power your RPi i.e by providing a power supply through the ethernet port. But for doing this you will require an extra shield called Raspberry Pi PoE HAT.

PoE is a networking method through which we can send power over an existing data connection on a network cable.

How to use the RPi PoE hat?
To use this just connect the shield on RPI and you are ready to go!

After connecting just plug in the ethernet and power the Rpi!! That's it!
Note: There should be a power supply connected to the network adapter from which we are taking the ethernet connection.
What if your RPi still doesn’t work?
Check if your power supply wire is working properly. Also, check with a multimeter if the PSU is providing the required amount of Power to the Rpi. If you are using a mobile phone or cable charger it might not be providing the required amount of power. The best way is to use the official Raspberry PI adapter.
Check if you have plugged in your flashed Operating System SD card. If you haven't installed OS then go to the Rpi official website and follow the steps for installing the Operating system on an SD card. This should solve the problem.
If the SD card is corrupted( unable to format) then you will need to get a new one. If there is no video output check the HDMI cable if it's working.
Conclusion
In this article, we have seen how to power the Raspberry Pi board using different methods. If you have any doubts feel free to comment.
If you appreciate our work don't forget to share this post and leave your opinion in the comment box.
Please do check out other blog posts about Turning an led with raspberry pi , Ultrasonic sensor with raspberry pi 4 , How to use Raspberry Pi as node in LoRAWAN , NODE TO NODE COMMUNICATION ON LORA WITH RASPBERRY PI 4 and RASPBERRY PI TIPS & TRICKS
Make sure you check out our wide range of products and collections (we offer some exciting deals!)
Excerpt
Frequently Asked Questions
1. Can you provide a power supply to Raspberry pi using standard USB ports?
No, You cannot provide a power supply unit (PSU) through the standard USB ports which are available for connecting the keyboard and mouse and getting the expected performance.
2. Can you provide a power supply to Raspberry pi using an audio jack?
There is an indirect way of powering Rpi through USB ports. We can do this by powering the Rpi with a Micro USB or USB C port and then supplying power through USB ports. Then remove the Micro USB or USB C power supply and your Rpi will still work. Since USB ports have a current limit of 500mA your Rpi may not work to its fullest performance or not work at all.
3. Can we use a PSU that can draw a higher current than 3 A for powering RPI 4?
Except for Raspberry Pi PICO and Raspberry Pi Zero, the rest have standard USB ports.
4. Can you use more than a 5V PSU unit for powering RPi 4?
You also cannot directly power supply using the audio and video composite jack available on the board.
5. What is the difference between powering RPi through GPIO and powering it through micro USB or USB C?
You can use a 5V PSU which can provide a high current than 3 A since your RPi will only take the required amount of current since the voltage is fixed (5V) and resistance too.
6. How to power raspberry pi 3?
Example: RPi 4 can draw a maximum current of 3 A. So even if we use a 5V PSU that can supply maximum current up to 4A, RPI 4 will only use the required amount of current i.e. up to 3A.
7. What power supply is required for Raspberry Pi 4 and 5?
Raspberry Pi 4 and 5 require a 5V power supply with at least 3A current output. It's crucial to use a reliable power adapter to ensure optimal performance. An official Raspberry Pi power supply is recommended for consistent voltage and current delivery, avoiding power-related issues.
8. Can I use a phone charger to power a Raspberry Pi?
Yes, you can use a phone charger to power a Raspberry Pi, as long as it provides 5V and at least 3A output. However, not all phone chargers are created equal; ensure it’s a high-quality charger to avoid performance issues.
9. What happens if I use a higher voltage adapter?
Using a higher voltage adapter can damage your Raspberry Pi. It might overheat or even burn the circuitry, leading to permanent failure. Always stick to the recommended 5V output to ensure safety and reliability.
10. How to power Raspberry Pi using batteries?
You can power a Raspberry Pi using batteries by employing a battery pack that outputs 5V. A USB power bank or a set of AA batteries with a step-up converter are good options. Ensure the setup can provide sufficient current, ideally 3A, to avoid performance issues.
11. Can Raspberry Pi run on solar power?
Yes, a Raspberry Pi can run on solar power. You’ll need a solar panel, a regulator to maintain 5V, and a battery system to store energy. This makes for a sustainable and portable power solution, especially for outdoor projects.
12. Why is my Raspberry Pi showing low power warning?
A low power warning on your Raspberry Pi indicates that the power supply isn't delivering enough voltage or current. This can cause performance issues or instability. Ensure you’re using a recommended power adapter that provides at least 5V and 3A.
13. How to check if the power supply is sufficient?
To check if the power supply is sufficient, use a multimeter to measure the output voltage. It should be around 5V. Additionally, observe the Raspberry Pi for low power warnings. If you get warnings, consider using a higher-rated power adapter.
14. Can I power Raspberry Pi from a laptop USB port?
Yes, you can power a Raspberry Pi from a laptop USB port, typically providing 5V with limited current. However, ensure the port can handle the required current, ideally 3A, especially if running peripherals. Performance may vary based on the laptop's USB specifications.
15. Is it safe to use third-party power adapters?
Using third-party power adapters can be risky. Ensure they meet the specifications of 5V and at least 3A output, and opt for brands with positive reviews. Poor quality adapters could lead to power issues or damage your Raspberry Pi.
16. What is the ideal power cable length for Raspberry Pi?
The ideal power cable length for Raspberry Pi is typically around 1 to 2 meters. This length minimizes voltage drop while maintaining flexibility for setup. Make sure to use high-quality cables to ensure stable power delivery.


