Arduino vs Micro:bit
Summary
Confused between micro and Arduino for your next project? Our blog provides a clear comparison to help you decide. Discover what micro and Arduino are, and explore their unique features. Compare their advantages, especially for beginners, highlighting why micro is great for easy, quick projects and why Arduino excels in versatility and scalability. Learn about various use cases and projects suited for each platform. This guide is perfect for educators, students, and hobbyists looking to make an informed decision. Click now to find the ideal platform for your creative needs!
INTRODUCTION:
Micro:bit is a user-friendly, beginner-friendly microcontroller usually designed for educational purposes. Typically, it is designed for children to improve their thinking abilities. The micro:bit is widely used in schools to teach programming, electronics, and computational thinking.
Children, with their keen eye for vibrant colours and a penchant for fun, gravitate toward products that exude playfulness. Just as children’s books burst with hues and whimsical illustrations, the micro:bit—a delightful pocket-sized computer—embraces this same spirit.

Its rainbow of card colours and twinkling LEDs captivates not only young minds but also those of us who secretly yearn for a touch of magic in our tech.
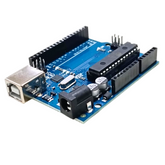
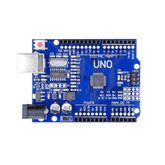
Next, we have Arduino, which is a versatile microcontroller platform with a wide range of hardware options. Usually, its design is boring for children.
The Arduino appeals to a niche market of seasoned robotics enthusiasts who have reached mid- and high-expertise levels. Its plain, flat colour and practical pins for inputs and outputs are its distinguishing features. Maybe the wise Arduino founders decided that this talented group didn't need a lot of customization.

What is micro:bit ?
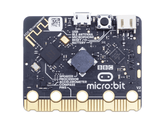
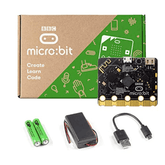
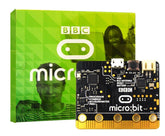
A micro:bit is a pocket sized computer designed for Children for the educational purpose.
Here are the components in it:
- LED Light Display: The micro:bit has a 5x5 grid of LEDs that can display text, images, and animations.
- Buttons: It has two programmable buttons (A and B) for user interaction.
- Sensors: The micro:bit includes an accelerometer, a compass, and a light sensor.
- Bluetooth Antenna: It supports wireless communication via Bluetooth.
- Input/Output Pins: It has GPIO pins for connecting external components.
- Sound Sensing and Playback in the latest version.

We can program micro:bit using various programming languages like – JavaScript, MicroPython, Microsoft MakeCode. micro:bit supports block coding and text-based coding in Python.
Especially the Makecode IDE developed by Microsoft is a very comprehensive and useful block-based coding program.
What is an Arduino?
An Arduino is an open-source platform which has the combination of both software and hardware.
Here are the components in it:
- Microcontroller: It acts as the brain of an Arduino, responsible for executing programs. It’s like a tiny computer designed for doing specific tasks.
- USB Port: Used to connect the Arduino board to your computer for programming and communication.
- Digital Pins: These pins can be used for input/output tasks.
- Analog Pins: These pins allow you to read analog signals, such as sensor values or variable voltages.
- Power Pins: These include power supply pins [orange] and ground pins [light orange].
- Reset Button: Pressing this button resets the microcontroller.
- Crystal Oscillator: Provides precise timing for the microcontroller.

Arduino is programmed with C/C++, and it is more technical and complicated programming language. This can be challenging for beginners and children.
Comparison of micro:bit and Arduino :
|
Feature |
Micro:bit |
Arduino |
|
Design |
It is user friendly and designed for children , it is also includes built-in LED matrix, buttons, and sensors. |
Modular, compatible with many sensors and modules. Usually requires additional components |
|
Microcontroller |
32-bit 64 MHz ARM Cortex-M4 |
Various options from different companies |
|
Programming Language |
Block-based coding (MakeCode, Scratch) and Python. |
C/C++ based, can be more technical and complex. |
|
Target Audience |
Children and Beginners sometimes Teachers |
Hobbyists, intermediate to advanced students, and engineers. |
|
Processing Power & Memory |
Generally better than most Arduino boards |
Wide range of options depending on the specific Arduino board |
|
Application Area |
Education, basic electronic projects, learning to code |
Hobby projects, complex electronic designs, prototyping. |

Advantages of micro:bit for beginners:
- Affordable: The micro:bit is a moderately priced device. There is less financial risk involved in giving it a try, and more families can access it.
- LED display Screen: The 25 pixels may appear small, this constraint encourages novices to concentrate more on functionality than graphics. Children can draw basic patterns in it.
- Text Display: The capability to show the text will helps to conveys the information to the user.
- Built-In Inputs and Sensors: Micro:bit is usually comes with in-built sensors and inputs so there is no need for the additional components. Beginners can experience without wiring.
- MakeCode Graphical Editor: Runs in a web browser, MakeCode is a free and good editor. It gives an idea how to connect elements that are mentioned in your code and is suitable for beginners.
- Simple Connections using Crocodile Clips: Using crocodile clips instead of jumper leads on a breadboard makes the connection easier. (
- Headphone/Speaker Connectivity: By connecting standard headphones or a buzzer/speaker, you can help kids understand common technology.
- Encourage Active Coding: The programmable, compact micro:bit helps the kids to develop software. It's perfect for coding animations, games, and various other tasks.
- Internet-based Community : An robust online community existing about the micro:bit. Projects, troubleshooting guidance and knowledge are easily available. Sharing your own work and learning from others are two great uses of it.
- Physical Interaction: You can interact directly with the micro:bit because to its included compass, accelerometer, and buttons. Step counters, games, and motion-controlled projects are all open to beginners.
Advantages of Arduino for beginners:
- Easy to use: Arduino is made in simplicity. Also, you can learn Arduino we can learn quickly .As it is user-friendly it allows the user to build a project.
- Open source: Arduino belongs to an open-source ethic. This means that plenty of community-generated projects, tutorials, and documentation are open for learners. It gets simpler to share your own work and learn from others.
- Affordable: Arduino Boards are relatively cheap and this will allow the beginners to use it.
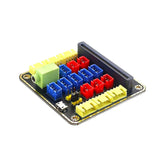
- Large Libraries and Shields: The Arduino platform has an large library and shield collection. Complex operations like connecting to sensors, displays, or communication modules are made simpler by these resources.
- High Compatibility: Sensors, actuators, and displays are the few of components that Arduino can work with. Beginners can experiment with a variety of hardware and applications because to its adaptability and compatibility.
- Plug and Play: In short, Arduino boards are plug-and-play devices. You can write code on them and upload it straight to the board through linking them via USB to your PC. It requires neither a complex setup or configuration.
- Minimalistic Hardware Interface: Arduino's hardware interface is simple and easy to use, even for Beginners. Sophisticated wiring or complicated components won't overwhelm you.
- Customizable Enclosures: Customizable Enclosures: Makers commonly utilize Arduino in their creative activities to develop and 3D print unique enclosures. This practical course blends physical design with programming.
- Radio Communication: The Arduino supports radio communication between devices. Beginners can create multiplayer games or collaborative projects where Arduinos can interact wirelessly.
- Community Support: There is a large and active community for Arduino. Online resources include projects, tutorials, and forums. If you get into trouble, chances are someone else has dealt with a similar situation and could help you.
Use cases and project on micro:bit and Arduino:
Micro:bit:

Educational Projects:
- Introduction to Coding: The Fundamentals of Coding The Micro:bit is ideal for novices, particularly children. It makes electronics and coding simpler, which makes it ideal for teaching the foundations of programming.
- STEM education: Utilising Micro:bit, communicate science, technology, engineering, and math ideas in an entertaining manner.
Simple Projects:
- Temperature Sensors: Use the supplied thermometer module to build a temperature monitoring system.
- Basic Games: Create simple games such as rock-paper-scissors, dice rollers, and rapid response testing.
- LED Matrix Displays: LED matrix displays for animations, text that scrolls, or visual feedback. Wearable Technology is costly:
Wearable Tech:
- Wrist Bands: Develop wearable bands which can display the text messages, tracking steps, heart rate
- Interactive Clothing: Sew micro:bit into cloth which will create a light-up garments.
Home Automation:
- Light Control: We can control the light via Bluetooth or any other applications.
- Security Alarms: Build a motion-activated sound system.
Arduino:

Versability and Expandibility:
- Sensor Integration: Arduino is capable of connecting to a wide range of sensors .Utilize it for data collection or environmental monitoring.
- Customizable Projects: Due to Arduino's adaptability, you can design specialized programs to meet specific demands.
Advanced Projects:
- Robotics: Using Arduino, construct robots for applications such as obstacle avoidance, line following, and remote control.
- Home Automation: Automate light, fans, switchs and Air conditioners.
IoT Applications:
- Smart Gardening: Monitoring moisturizing of the soil and automate watering systems.
- Energy Consumption: Helps to reduce the use of electricity in Home and the appliances.
Interactive Art and Installations:
- LED Display’s: Create dynamic light using Arduino.
- Sound Sculptures: Integrate sensors, speakers,and LED’s to build interactive art.
Conclusion:
Micro:bit is an easy-to-use, beginner-friendly device with built-in modules, block-based programming interface, and simplicity. It's ideal for wearable technology, educational initiatives, and teaching young people to code.
Arduino is a multipurpose workhorse that offers a large selection of boards, text-based programming, and countless possibilities. From IoT to robots, it enables makers to produce distinctive solutions.
Frequently Asked Questions
1. Which is more suitable for Beginners - Arduino or Micro:bit?
Arduino and Micro:bit are both beginner-friendly options.
Arduino excels in complex projects due to its expandability and advanced programming.
Micro:bit shines with its block-based coding and built-in features, making it ideal for beginners and quick prototypes.
2. What is the function of micro:bit?
The micro:bit is a pocket-sized, programmable computer designed to introduce kids to how software and hardware work together. It is an interactive and programmable device that consists of various input-output features such as LED light displays, sensors, buttons, and more. The micro:bit is primarily designed for children aged between 8 and 14 years to learn coding and physical computing.
3. What file type micro:bit uses?
Micro:bit uses Python (.py), binary (.hex), text (.txt) and other files for programming, data storage, and project creation.
4. Why Arduino is used widely?
Accessible & Affordable: Open-source hardware/software, large community, and low costs make it beginner-friendly.
Easy to Use: Beginner-friendly interface and pre-written code libraries simplify coding and electronics.
Flexible: Versatile power options and various input/output pins allow for a wide range of applications.
Arduino empowers individuals and organizations to bring their ideas to life.
Arduino excels in complex projects due to its expandability and advanced programming.
Micro:bit shines with its block-based coding and built-in features, making it ideal for beginners and quick prototypes.
Accessible & Affordable: Open-source hardware/software, large community, and low costs make it beginner-friendly.
Easy to Use: Beginner-friendly interface and pre-written code libraries simplify coding and electronics.
Flexible: Versatile power options and various input/output pins allow for a wide range of applications.


