Interfacing the DHT11 sensor with the ESP32 board
Summary
Dive into the fascinating realm of IoT with our latest blog post, "Interfacing the DHT11 Sensor with the ESP32 Board." Discover the basics of DHT11 sensor technology and the powerful capabilities of the ESP32 board. Uncover the essential requirements and learn step-by-step how to wire these components effectively. Delve into advanced applications, unraveling the sensor's potential to revolutionize your projects. From measuring temperature to humidity, this blog covers it all! Don't miss out
Introduction:
In the world of the IoT (Internet of Things), sensors are the major component of electronics that gather necessary data for a variety of applications. Among these sensors, the DHT11 stands out as capable of measuring temperature and humidity accurately.
In this blog, we will take you through the process of interfacing a DHT11 sensor with the ESP32 development board. It has Wi-Fi connectivity, which makes it easy to collect data from sensors like the DHT11 and send it to any platform (the IIOT Platform). This interfacing of the DHT11 sensor with the ESP32 development board allows users to monitor the temperature and humidity data in their homes from anywhere, ensuring perfect comfort and energy efficiency.
By attaching the DHT11 sensor to the ESP32 board, you can gather real-time data and remotely monitor and analyse it using the ESP32's strong processing abilities and Wi-Fi connectivity.
Before going to interface the DHT11 sensor with the ESP32 board, let's go through the basics of the DHT11 and the ESP32 board:
read more : ESP32 Alexa Home Automation System with Echo DOT
DHT11 Sensor:
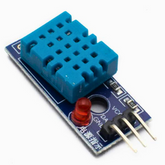
The DHT11 sensor is a low-cost digital temperature and humidity sensor that provides accurate readings. It has a single-wire communication interface, making it easy to connect to microcontrollers like the ESP32 board. The DHT11 sensor has a temperature measurement range of 0 to 50 degrees Celsius with an accuracy of 2 degrees Celsius. It also has a humidity measurement range of 20% to 90% with an accuracy of 5%. The sensor includes a capacitive humidity sensor and a thermistor for temperature measurement. It requires a pull-up resistor and can be powered by a voltage between 3.3 volts and 5 volts.

ESP32 board:
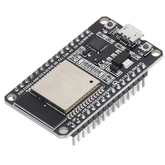
The ESP32 development board is an easy-to-use microcontroller board with built-in Wi-Fi connectivity that can help us integrate it with the IoT application. It has more features that can help us make IoT projects easier.
Understanding these basics will help in effectively interfacing the DHT11 temperature and humidity sensor with the ESP32 board. By connecting the sensor's data pin to any of the GPIO pins on the ESP32, we can easily read the temperature and humidity values using the one-wire communication interface. With the ESP32's built-in Wi-Fi and Bluetooth, we can further enhance the functionality of our IoT project by sending the sensor data to a cloud platform for remote monitoring and control.

Requirement:
Before embarking on this enlightening journey, ensure you have all the necessary components:
- ESP32 Development Board
- DHT11 Sensor
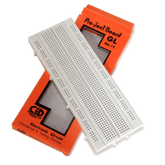
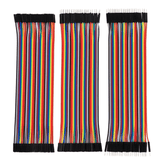
- Breadboard and jumper wires
- Micro-USB Cable
- Arduino IDE (with ESP32 support installed)
read more : What is NodeMCU ESP8266: Complete Guide
Wiring the components:
Step 1: Connect the DHT11 Sensor
To embark on our journey into the world of IoT, let's set up the hardware with precision:
Gently insert the DHT11 sensor into the breadboard, positioning it securely.
Establish the following connections between the DHT11 sensor and the ESP32 development board:
DHT11 VCC (Voltage) to ESP32 3.3V (Voltage)
DHT11 GND (ground) to ESP32 GND (ground)
DHT11 Data Pin to ESP32 GPIO (General-Purpose Input/Output) Pin (e.g., GPIO5)

After interfacing the DHT11 sensor with the ESP32 board. Now it’s time to go through the programming of ESP32 board to get the data from the DHT11 sensor and show it on the serial monitor.
Step 2: Programming and Explanation
#include

#define DHTPIN 5

#define DHTTYPE DHT11 // DHT sensor type (DHT11)

DHT dht (DHTPIN, DHTTYPE);

void setup() {

Serial.begin(9600); // Initialize serial communication.

dht.begin(); // Initialize the DHT sensor.

}

void loop() {

delay(2000); // Wait for 2 seconds between readings

float humidity = dht.readHumidity(); // Read humidity value

float temperature = dht.readTemperature(); // Read the temperature value in Celsius.

 Serial.print("Humidity: ");

 Serial.print(humidity);

 Serial.print("%\t");

 Serial.print("Temperature: ");

 Serial.print(temperature);

 Serial.println("°C")
Explanation:
Including the DHT Library:
The code begins by including the DHT library using #include <DHT.h". This library is essential for working with DHT series sensors, like the DHT11. To install this library:
Open the Arduino IDE.
Navigate to the "Sketch" menu and select "Include Library."
In the dropdown menu, choose "Manage Libraries."
In the Library Manager window, search for "DHT".
Once you locate "DHT" in the list, click the "Install" button.
Defining Constants:
We define two constants (DHTPIN and DHTTYPE). DHTPIN is set to 5, indicating that the DHT sensor is connected to digital pin 2 of the ESP32 board, and DHTTYPE is set to DHT11, indicating the type of DHT sensor being used.
Initializing the DHT Object:
The code creates a DHT object named "dht" by passing DHTPIN and DHTTYPE as arguments to the constructor. This object is used to interact with the DHT sensor to retrieve the temperature and humidity data.
Setup Function:
In the setup() function, we initialize the serial communication using "Serial.begin(9600)".
with a baud rate of 9600 that enables the serial monitor to print the data. And dht.begin() initializes the DHT sensor, preparing it for data retrieval.
Loop Function:
In the loop() function, we create two variables to store the values of temperature and humidity data by using the dht.readTemperature() and dht.readHumidity() functions. The sensor data is then printed to the serial monitor using Serial.print() and Serial.println() statements with a delay of 2 seconds.
Step 3: Uploading the Code
Connect your ESP32 development board to your computer using the micro-USB cable. Open the Arduino IDE and navigate to the Tools menu, ensuring that you have correctly selected the ESP32 board and the appropriate port. Copy the above code and paste it into the Arduino IDE. Finally, click the "Upload" button in the IDE to initiate the process of transferring the code to your ESP32 development board.
Step 4: Viewing the Data
After uploading the code onto the ESP32 development board, you can see the temperature and humidity data returned by the DHT11 sensor. For this, open the Arduino IDE's serial monitor (accessible through Tools > Serial Monitor). Configure the baud rate according to the code (9600) for appropriate communication. Now, the humidity and temperature data are elegantly displayed, with updates arriving every 2 seconds.
Also, read our blog on What is Nodemcu ESP8266 explaining the definition, specification, construction, and how to upload programs to ESP8266 Node.
Advanced Applications
While you've mastered the fundamentals of interfacing a DHT11 sensor with an ESP32 board, your journey into the IoT realm is far from over. Let's explore some advanced applications that leverage this newfound knowledge:
Environmental Data Logger:
Transform your ESP32-DHT11 setup into a robust environmental data logger. Store temperature and humidity readings on an SD card or transmit them to a remote server. This allows you to create historical records and make data-driven decisions in various domains, including climate research and building automation.
IoT-based home automation:
Elevate your home to the next level by integrating your DHT11-ESP32 duo into a home automation system. Control HVAC systems, fans, or humidifiers based on real-time environmental data. Imagine a home that adapts to your comfort preferences automatically.
Weather Station:
Build a personalized weather station with your DHT11-equipped ESP32. Collect data over time, and with the addition of additional sensors like a barometer, you can even predict local weather trends. Share your data online or with weather enthusiasts in your community. Display the current temperature and humidity on the webserver and use the ESP32's Wi-Fi capabilities to update the data in real-time.
read more : All about ESP32 Camera Module
Conclusion:
In this investigation of IoT possibilities, we've successfully bridged the DHT11 sensor with the ESP32 development board, opening the door to a world of data-driven innovation. The DHT11's cost-effective accuracy, coupled with the ESP32's Wi-Fi capabilities, empowers us to monitor temperature and humidity effortlessly. Our journey through this blog began with the basics of the DHT11 sensor and the ESP32 board, the hardware connection between them, and the development of code to receive and display real-time temperature and humidity data. However, this is merely the genesis. Beyond basic monitoring, we can upgrade this project to the next level as an environmental data logger, an IoT-based home automation system, or a weather station.
If you appreciate our work don't forget to share this post and leave your opinion in the comment box.
Please do check out other blog posts about Popular electronics
Make sure you check out our wide range of products and collections (we offer some exciting deals!)
Excerpt
Frequently Asked Questions
1. How to connect DHT11 sensor to ESP32?
Connecting the DHT11 sensor to the ESP32 is a relatively simple task. The two components are easily connected via pin sockets. Start by inserting one of the pins from your DHT11 sensor into GPIO number four on your ESP32 board, and then insert the second pin into any available ground connection port. Once these connections have been made securely, you can start using software such as Arduino IDE to begin transmitting data between them seamlessly - this will be used for reading temperature and humidity values collected by the DHT11. Additionally, if required an additional power source may also need connecting in order to provide sufficient voltage that allows functionality across both units; however when done correctly all steps should result in successful connection set up!
2. What is DHT11 humidity temperature sensor with ESP32?
The DHT11 humidity temperature sensor with ESP32 is a powerful combination for any project requiring accurate temperature and/or humidity data. This low-cost digital device provides reliable measurement of environmental conditions in both indoor and outdoor environments, making it ideal for use in climate control, industrial monitoring, security systems and more. The two sensors work together to provide precise readings from -40°C up to +80°C with an accuracy of ±0.5°C while measuring relative humidity levels between 0% to 100%. Combining the capabilities of these two devices makes this an incredibly versatile tool capable of supplying real time feedback on air quality or other ambient circumstances without additional electronics required. With continuous active operation mode enabled you can be sure that critical metrics are being monitored 24/7 no matter what environment they’re deployed in!
3. Why DHT11 sensor is used?
The DHT11 sensor is one of the most popular and widely used sensors in the world today. It's ideal for monitoring temperature, humidity and other environmental conditions that can affect our quality of life or production processes. This economical device measures just a few cents per unit making it an affordable option for anyone needing to monitor their environment. Its accuracy also makes it perfect for scientific research projects as well, giving researchers reliable data with minimal cost investments. Additionally, its compact size allows us to place them almost anywhere; which further improves ease of use while providing accurate readings at record speed - all without consuming too much power! All these reasons make The DHT11 Sensor both practical and convenient making it a must-have component when any kind or level of precision monitoring is needed quickly yet accurately on limited budget constraints.
4. How do I connect a DHT11 sensor to an ESP32 board?
To connect a DHT11 sensor to an ESP32 board, connect the VCC pin of the DHT11 to a 3.3V pin on the ESP32, then connect the GND pin to the ground. Finally, connect the data pin of the DHT11 to a digital GPIO pin on the ESP32, for example, D4. Ensure you pull up the data line with a 10kΩ resistor for stable readings.
5. Which library should be used for DHT11 on ESP32?
The most commonly used library for the DHT11 sensor on the ESP32 is the "DHT sensor library" by Adafruit. You can easily install it via the Arduino IDE Library Manager. This library supports both DHT11 and DHT22 sensors, allowing you to fetch temperature and humidity data efficiently.
6. What is the difference between DHT11 and DHT22 sensors?
The DHT11 sensor has a narrower temperature range (0 to 50°C) and lower humidity accuracy compared to the DHT22, which can measure -40 to 80°C and has better precision. Additionally, the DHT22 provides a wider humidity range (0-100%) and is generally more expensive but offers more reliable data.
7. How often can you get readings from a DHT11 sensor?
You can get readings from a DHT11 sensor approximately once every second. It's recommended to wait at least 1-2 seconds between readings to avoid inaccurate data. This time allows the sensor to stabilize before providing another measurement.
8. Can you send DHT11 sensor data over WiFi using ESP32?
Yes, you can easily send DHT11 sensor data over WiFi using an ESP32. By programming the ESP32 with a suitable library, you can connect to a WiFi network and send data to a web server, MQTT broker, or even a cloud platform like ThingSpeak or Blynk.
9. What are the accuracy limitations of a DHT11 sensor?
The DHT11 sensor has an accuracy of ±2°C for temperature and ±5% for humidity. These limitations can affect measurements, especially in extreme conditions. As a budget sensor, it's ideal for basic applications but may not be suitable for precision-required environments.
10. How to display DHT11 data on a web server with ESP32?
To display DHT11 data on a web server using ESP32, program the ESP32 to connect to WiFi and use a web server library like WebServer.h. Retrieve the DHT11 data within your loop function, and create HTML content to show it. Host the server, and access it via a browser for real-time data display.
11. What power requirements does a DHT11 sensor have?
The DHT11 sensor operates at 3.3V to 5V and consumes minimal power, about 0.3mA during measurements and around 60μA in idle mode. This low power requirement makes it an excellent choice for battery-powered applications.
12. How do you calibrate or test a DHT11 sensor with ESP32?
To calibrate or test a DHT11 sensor with an ESP32, first read the sensor's data multiple times under controlled conditions, then compare the results against a known accurate reference device. Adjust your readings in the code if necessary. Ensure proper wiring and conditions for consistent results.
13. What projects can you build using ESP32 and DHT11 sensor?
You can create various projects using the ESP32 and DHT11, such as a real-time weather station, smart home monitoring systems or IoT-based temperature and humidity loggers. These projects allow you to track environmental conditions and automate tasks based on sensor readings.


