Interfacing GPS Module with Raspberry Pi
Summary
Discover the perfect duo for your DIY projects in our latest blog: "Interfacing GPS Module with Raspberry Pi." We kick things off with an introduction to Raspberry Pi, the versatile microcomputer, and delve into the fascinating world of GPS modules. Our informative post features a detailed circuit diagram, step-by-step connection instructions, and a sneak peek at the code you need to make it all work seamlessly. Finally, we wrap it up with a compelling conclusion that will leave you eager to embark on your own GPS-powered Raspberry Pi adventures. Get ready to navigate the world of tech with us!
Introduction to Raspberry Pi
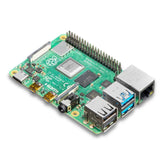
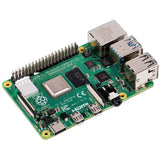
Imagine a tiny but mighty computer known as the Raspberry Pi. It's like a credit card-sized computer that doesn't cost much. This amazing creation has captured the attention of tech enthusiasts everywhere. Developed by the Raspberry Pi Foundation, it was made to help people learn about computers and do fun electronic projects on a budget. Thanks to its low cost, small size, and a big community of fans and developers, Raspberry Pi has become a favorite for hobbyists, teachers, and professionals.

There are different versions of the Raspberry Pi, but they all share one goal: to be a tool for learning, experimenting, and coming up with cool solutions. Whether you want to create a home theater system, automate your home, or build a robot, Raspberry Pi can make it happen.
Check Out our Wide Range of Raspberry Pi Power Supply.
Introduction to GPS Module :
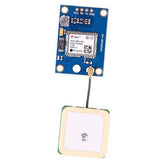
Now, let's venture into the world of GPS (Global Positioning System). GPS is like a space-based navigation system that tells you exactly where you are on Earth and what time it is. GPS modules, such as neo 6m gps module, NEO-7M, or NEO-8M, let you add GPS capabilities to your Raspberry Pi projects.

These modules connect with satellites that circle our planet to figure out your precise location, like the latitude and longitude. This is super useful for things like tracking vehicles in real-time, finding hidden treasures in geocaching
games, or navigating the great outdoors. A GPS module usually has a GPS receiver, a special antenna, and electronics to process and share the data.
Circuit diagram:

Connections:
To make your GPS module work with your Raspberry Pi, you need to plug things together:
1. Power It Up: Connect the GPS module's power (VCC) to either the Raspberry Pi's 3.3V pin or the 3.3V GPIO pin.
2. Ground It: Link the GPS module's ground (GND) to the Raspberry Pi's ground (GND) pin.
3. Talk to Each Other: Most GPS modules chat with the Raspberry Pi using UART (Universal Asynchronous Receiver/Transmitter). Connect the GPS module's TX (transmit) to the Raspberry Pi's RX (receive) pin, and vice versa, by attaching the GPS module's RX (receive) to the Raspberry Pi's TX (transmit) pin.
Code:
import serial # Import serial package

from time import sleep

import webbrowser # Import package for opening link in the browser

import sys # Import system package


def GPS_Info():

global NMEA_buff

global lat_in_degrees

global long_in_degrees

nmea_time = []

nmea_latitude = []

nmea_longitude = []

nmea_time = NMEA_buff[0] # Extract time from GPGGA string

nmea_latitude = NMEA_buff[1] # Extract latitude from GPGGA string

nmea_longitude = NMEA_buff[3] # Extract longitude from GPGGA string


print("NMEA Time: ", nmea_time,'\n')

print ("NMEA Latitude:", nmea_latitude,"NMEA Longitude:", nmea_longitude,'\n')


lat = float(nmea_latitude) # Convert string into float for calculation

longi = float(nmea_longitude) # Convert string into float for calculation


lat_in_degrees = convert_to_degrees(lat) # Get latitude in degree decimal format

long_in_degrees = convert_to_degrees(longi) # Get longitude in degree decimal format


# Convert raw NMEA string into degree decimal format

def convert_to_degrees(raw_value):

decimal_value = raw_value/100.00

degrees = int(decimal_value)

mm_mmmm = (decimal_value - int(decimal_value))/0.6

position = degrees + mm_mmmm

position = "%.4f" %(position)

return position


gpgga_info = "$GPGGA,"

ser = serial.Serial ("/dev/ttyS0") # Open port with baud rate

GPGGA_buffer = 0

NMEA_buff = 0

lat_in_degrees = 0

long_in_degrees = 0


try:

while True:

received_data = (str)(ser.readline()) # Read NMEA string received

GPGGA_data_available = received_data.find(gpgga_info) # Check for NMEA GPGGA string

if (GPGGA_data_available>0):

GPGGA_buffer = received_data.split("$GPGGA,",1)[1] # Store data coming after "$GPGGA," string

NMEA_buff = (GPGGA_buffer.split(',')) # Store comma-separated data in buffer

GPS_Info() # Get time, latitude, longitude


print("lat in degrees:", lat_in_degrees," long in degree: ", long_in_degrees, '\n')

map_link = 'http://maps.google.com/?q=' + lat_in_degrees + ',' + long_in_degrees # Create a link to plot location on Google map

print("<<<<<<<>>>>>\n") # Press ctrl+c to plot on the map and exit

print("------------------------------------------------------------\n")


except KeyboardInterrupt:

webbrowser.open(map_link) # Open the current position information in Google Maps

sys.exit(0)
Code Explanation:
We import the necessary packages, including serial for serial communication, time for introducing delays, webbrowser for opening links in a web browser, and sys for system-related operations.
The GPS_Info() function extracts time, latitude, and longitude information from the received NMEA string and converts them into a more human-readable format.
The convert_to_degrees() function converts raw NMEA values into degree decimal format, which is more suitable for mapping.
We specify the target NMEA string we're looking for using gpgga_info and configure the serial port using serial.Serial().
The code enters a loop to continuously read NMEA data from the serial port. When a valid GPGGA data string is found, it's processed to obtain time, latitude, and longitude information, which is then displayed.
We construct a link for Google Maps based on the latitude and longitude values obtained.
Finally, we handle the possibility of a keyboard interrupt (Ctrl+C) to open the Google Maps link and exit gracefully.
This code allows you to collect GPS data from the Raspberry Pi's serial port, parse it, and plot the location on Google Maps. It's a valuable tool for various location-based projects.
read more : Raspberry Pi in IOT
Conclusion:
So, connecting a GPS module to your Raspberry Pi opens the door to many exciting location-based projects. By making these physical connections and using Python code, you can easily add GPS features to your Raspberry Pi creations. Whether you're building a GPS tracker, a weather station, or something else entirely, the Raspberry Pi and GPS module combo is a budget-friendly and accessible way to explore the world of GPS technology. So, grab your Raspberry Pi and start your GPS adventure!
If you appreciate our work don't forget to share this post and leave your opinion in the comment box.
Please do check out other blog posts about Popular electronics
Make sure you check out our wide range of products and collections (we offer some exciting deals!)
Excerpt
Frequently Asked Questions
1. How to interface a GPS module?
Interfacing a GPS module is easier than ever. To get started, you'll need power and communication connections for the module to work properly. Once connected using an interface cable or breakout board, your device can access dedicated software that will interpret signals from satellites – providing location data with centimetre precision accuracy in real time! With our advanced pre-assembled modules, set-up takes no more than a few minutes so you're ready to conquer any terrain within seconds of plugging in the cables. Get out there today and make sure none of your outdoor adventures are lost forever!
2. Which GPS module is best for Raspberry Pi?
GPS modules are essential for a number of Raspberry Pi projects. Choosing the best GPS module depends on numerous factors, including accuracy, size and budget. The Ublox NEO-6M is an excellent choice as it can track both US and Russian navigation systems simultaneously while offering high accuracy levels of up to 2m or better. It has an onboard ceramic antenna which does not require any external components – making it highly space efficient - perfect if you’re working with limited real estate in your project design! Its small form factor also means that its battery draw isn't too heavy meaning longer periods between charging/replacement cycles than some other models available today. So if you need a reliable, easy-to-maintain GPS tracking system then definitely consider the Ublox NEO 6M for your next Raspberry Pi-related project!
3. How do you connect a GPS module to a Raspberry Pi board?
To connect a GPS module to your Raspberry Pi, use the GPIO pins. Connect the TX pin of the GPS to the RX pin on the Pi and the RX pin of the GPS to the TX pin on the Pi. Finally, power the module using the 3.3V or 5V pin, depending on the module’s specifications.
4. What interface (UART/I2C/SPI) does a GPS module use with Raspberry Pi?
Most GPS modules connect to the Raspberry Pi via the UART interface. This allows for serial communication, providing a simple way to send and receive GPS data directly to and from the Pi.
5. What is the minimum voltage requirement for most GPS modules?
Most GPS modules require a minimum voltage of 3.3V to 5V. Always check the specifications of your specific module to ensure it operates within this voltage range for optimal performance.
6. How do you read latitude and longitude on Raspberry Pi from GPS data?
To read latitude and longitude from GPS data on a Raspberry Pi, use libraries like GPSD or PyGPS. These libraries parse NMEA sentences received from the GPS module, allowing you to extract coordinates easily.
7. What Python libraries help parse GPS data on Raspberry Pi?
Popular Python libraries for parsing GPS data on Raspberry Pi include gpsd-py3 and gpxpy. These libraries facilitate interaction with your GPS module, making it simpler to read and use GPS data in your projects.
8. Can Raspberry Pi use GPS data for time synchronization?
Yes, a Raspberry Pi can use GPS data for time synchronization. By integrating GPS time signals, you can achieve highly accurate timekeeping, perfect for applications needing precise timing, like data logging or communication systems.
9. What are common challenges when using GPS modules indoors?
Common challenges when using GPS modules indoors include weak satellite signals and multipath reflections. These conditions can lead to inaccurate readings or no signal at all. Using an external antenna may help improve performance.
10. How accurate is GPS data when interfaced with Raspberry Pi?
GPS data accuracy can vary, typically ranging from 5 to 10 meters under ideal conditions. Factors like satellite visibility and atmospheric conditions impact accuracy, but integrating additional sensors or techniques can enhance precision.
11. What are practical GPS-based projects using Raspberry Pi?
Some practical GPS-based projects include creating a tracking device, building a personal weather station, or developing a navigation system for drones. These projects utilize GPS data for location tracking and data collection purposes.
12. What power and antenna considerations should you keep when using GPS modules?
When using GPS modules, ensure you provide the correct power supply as per the module’s specifications, typically between 3.3V and 5V. Additionally, consider using an active antenna if outdoors to enhance signal reception and accuracy.


