5 hacks about raspberry pi that you did not know
Summary
Discover 5 little-known Raspberry Pi hacks that will elevate your experience to a whole new level! In Hack 5, learn how to leverage the Raspberry Pi Imager for advanced configurations. Hack 4 unleashes the true potential of the terminal, while Hack 3 teaches you to optimize GPU memory allocation. In Hack 2, find out how to take and print screenshots effortlessly. Lastly, in Hack 1, explore temperature monitoring and prevent throttling issues. Don't miss these ingenious tricks to supercharge your Raspberry Pi projects. Read on and unlock the untapped potential of this tiny wonder!
Introduction
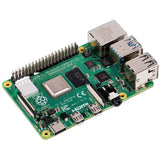
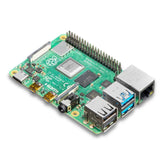
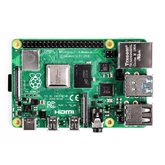
The Raspberry Pi has become an incredibly popular single-board computer, favored by hobbyists, educators, and professionals alike. Its versatility and affordability have opened up endless possibilities for various projects and applications. However, to make the most of your Raspberry Pi, it's essential to have a solid understanding of some handy tips and tricks that can enhance your experience and productivity.
Browse the Best Selection of Raspberry Pi Displays.
Raspberry Pi Hack 5: Advanced Configuration with Raspberry Pi Imager
Introduction to Raspberry Pi Imager

Raspberry Pi Imager is a powerful tool developed by the Raspberry Pi organization to simplify the process of burning operating system images onto an SD card or USB drive. It is compatible with major operating systems and offers an intuitive interface for users of all levels.
Accessing the Advanced Menu for pre configuration
One of the lesser-known features of the Raspberry Pi Imager is its Advanced Menu. By pressing Control + Shift + X, users can access this menu, which allows them to set essential configurations in advance. These configurations include setting the hostname, enabling the SSH server for remote login, configuring authentication with a password or public key, and specifying WiFi credentials.
Configuring Hostname, SSH Server, and Authentication
The Advanced Menu provides a convenient way to preconfigure the hostname, which is crucial for device identification on a network. Additionally, enabling the SSH server allows remote access, making it easier to manage the Raspberry Pi without the need for a direct connection. Users can also choose between password-based or public key authentication, enhancing security based on their preferences.
Setting up WiFi Credentials
Configuring WiFi credentials in advance can save time during the initial setup process. By inputting the WiFi details in the Advanced Menu, users ensure that their Raspberry Pi will automatically connect to the designated network upon booting up.
Burning Home Assistant OS with Raspberry Pi Imager

A particularly exciting feature in Raspberry Pi Imager is the ability to choose and burn various specific-purpose operating systems, such as Home Assistant OS. This capability streamlines the setup process for specific projects, making it even more efficient for users to get started with their Raspberry Pi applications.
Raspberry Pi Hack 4: Unleashing the Power of the Terminal

The Significance of the Terminal in Linux-based OS
The Terminal, often referred to as the command-line interface (CLI), is a crucial component of Linux-based operating systems like Raspberry Pi OS. It provides a powerful way to interact with the system through text commands, granting users greater control and flexibility.
Opening Multiple Full-Screen Terminals
For users engaged in complex tasks, such as bash scripting or VI editing, opening multiple full-screen terminals can significantly enhance productivity. Raspberry Pi OS allows users to switch between up to six full-screen terminals using the Ctrl+Alt+F1 to F6 keyboard shortcut.
Switching between Terminal and Graphical User Interface
While the Terminal provides a wealth of capabilities, many users also value the convenience of the Graphical User Interface (GUI). With the Ctrl+Alt+F7 keyboard shortcut, users can seamlessly switch between the Terminal and the familiar GUI, allowing for a smooth transition between different tasks.
Raspberry Pi Hack 3: Managing GPU Memory Allocation

Understanding GPU Memory Allocation in Raspberry Pi OS
The Raspberry Pi features a GPU (Graphics Processing Unit) that plays a significant role in graphics rendering and processing. Raspberry Pi OS reserves a certain amount of memory (RAM) for the GPU, which can impact overall performance.
Adjusting Memory Allocation for Headless Projects
For headless projects that don't require a graphical interface, allocating less memory to the GPU can free up valuable resources for other tasks, enhancing overall system performance.
Enhancing Graphics-Intensive Applications with More Memory
On the other hand, users involved in graphics-intensive applications can benefit from allocating more memory to the GPU, ensuring smoother and more responsive performance for their projects.
Raspberry Pi Hack 2: Taking Screenshots and Printing Screens

Taking Screenshots within the Graphical Interface
Capturing screenshots within the Graphical Interface of Raspberry Pi OS is straightforward. By pressing the "Print Screen" key, users can save an image of their screen directly to their home folder in PNG format.
Capturing Screenshots Remotely over SSH with the "scrot" Tool
For those working remotely on their Raspberry Pi via SSH, taking screenshots is still possible. By using the "scrot" tool from the command line, users can capture and save screenshots remotely and transfer them to their local machine if needed.
Raspberry Pi Hack 1: Monitoring Temperature and Preventing Throttling

Checking GPU and CPU Temperature
Monitoring the temperature of the Raspberry Pi's CPU and GPU is crucial for ensuring optimal performance and avoiding potential overheating issues. Users can check the GPU temperature using the "vcgencmd measure_temp" command and the CPU temperature by accessing "/sys/class/thermal/thermal_zone0/temp."
Monitoring Raspberry Pi Temperature in the Graphical Interface
For users working in the graphical interface of Raspberry Pi OS, a half-filled thermometer icon indicates that the core temperature is between 80-85 degrees Celsius. A full thermometer icon is displayed if the temperature exceeds 85 degrees, signaling possible throttling to reduce temperature and prevent performance issues.
Understanding Throttling and Performance Implications
Throttling occurs when the Raspberry Pi's temperature reaches critical levels, resulting in reduced CPU performance. By monitoring and managing temperature, users can prevent throttling and ensure their Raspberry Pi operates at its full potential.
Conclusion
This article has provided an in-depth overview of five valuable Raspberry Pi Tips & Tricks to optimize performance, enhance efficiency, and streamline various tasks on the Raspberry Pi.
By implementing these tips, users can maximize the potential of their Raspberry Pi, making it a versatile tool for a wide range of projects and applications.
As you embark on your Raspberry Pi journey, may these tips empower you to explore and create with confidence. Happy tinkering and best wishes for your future endeavors!
If you appreciate our work don't forget to share this post and leave your opinion in the comment box.
Please do check out other blog posts about Popular Electronics
Make sure you check out our wide range of products and collections (we offer some exciting deals!)


