Introduction
Obstacle avoider robots driven by Arduino and IR sensors are an excellent starting point for people interested in learning robotics.
Unlike other robotic systems, these advanced devices can explore their surroundings automatically thanks to best-in-class infrared detecting technology.
As a result, they have an incredible capacity to detect items in front of them before deciding which way is best for avoiding barriers or any prospective impediments within range.
This amazing feature makes it easier than ever before for users with little knowledge of how robots work—and who want something fun yet easy to use—to set up obstacle avoidance navigation tasks quickly and reliably without much fuss!
With such powerful sensor technology integrated into these incredible devices, your possibilities with autonomous robotics become endless!
In this blog, we will learn to build an obstacle-avoiding robot based on Infra-Red sensors.
The primary purpose of this bot is to traverse forward autonomously and change directions if it encounters any significant obstacle in its path.
The bot will avoid any obstacle big enough to be detected by the Infra-Red sensor mounted on the front.
read more: How to use Buzzer with Arduino
Components required to make obstacle-avoiding robot
- Arduino Uno (with cable)
- L298 Motor Driver
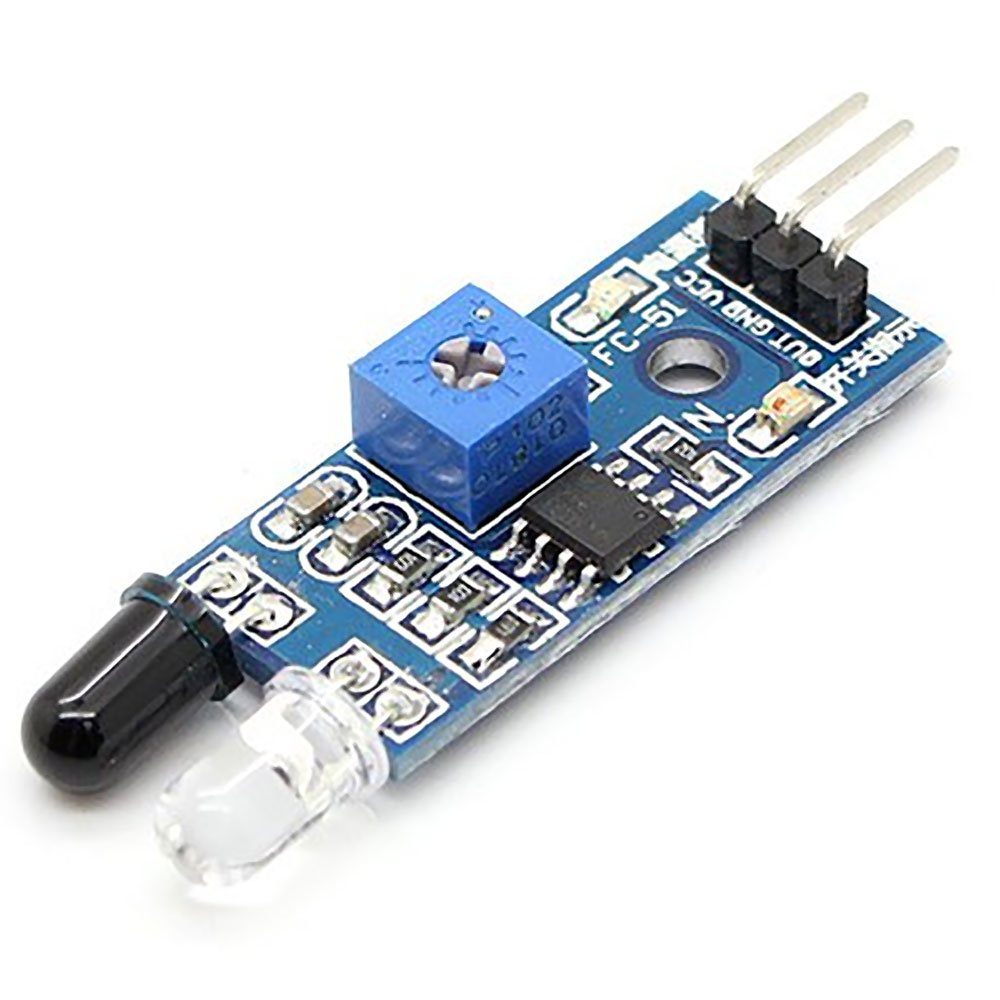
- Range adjustable IR sensor (x3)
- Chassis (x1)
- B.O. DC Motors (x2)
- Battery container (x1)
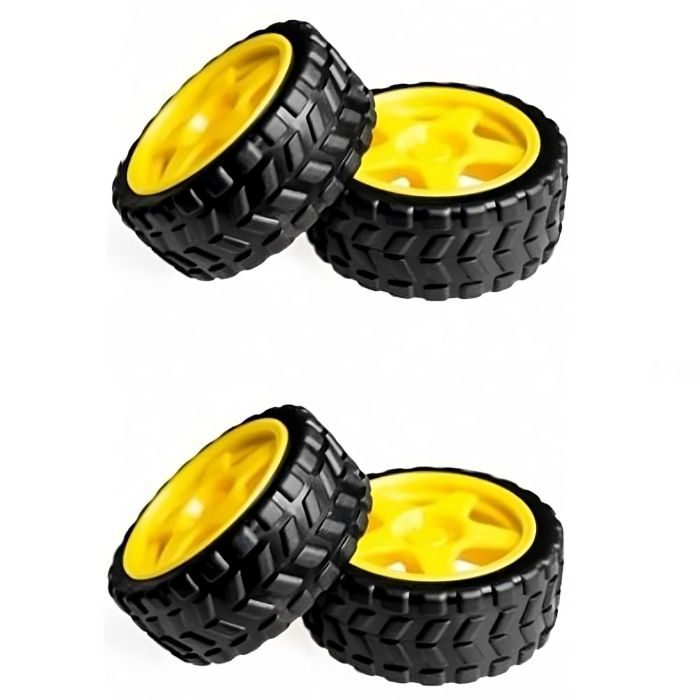
- Wheels (x2)
- Castor wheel
- Jumper wires: male-to-male |male-to-female |female-to-female (x10)
- Switch (x1)
- Spacers (x4)
- M3*30 screw (x4)
- M3*8 screw (x15)
- M3 nut (x15)
read more : Arduino Sensor types and Applications
Also, read our blog on the Infrared Sensor detailing the working principle, applications, and different types of infrared sensors.
Steps to Make Obstacle Avoider Robot Using Arduino and IR Sensor:
Step 1: Make the Robot itself
The first step is to construct the bot itself, which consists of two powered wheels and a caster wheel at the back.
The two front wheels are powered by 5V-12V B.O. motors. The caster wheel is mounted to the bot's rear.
This caster wheel ensures the overall stability of the bot while enabling unrestricted movement for the rear.
Step 2: Add the hardware required to power robot
After configuring the sensors, we must establish the robot's motion and steering system. This requires the installation of the parts that will power and turn the bot's wheels.
When everything is ready, our robot will be able to move around and investigate its environment! Now that we have everything set up, let's see how the bot moves!
We will be using an L298 motor driver to drive the wheels and the entire system will be powered by a 3S (11.1V) LiPo battery.
This twin bidirectional motor driver is based on the extremely popular L298 twin H-Bridge Motor Driver IC.
This module allows you to simply and independently operate both motors in both directions. In addition, a switch is utilized to enable and disable the bot.
Step 3: Add IR Sensor to detect obstacles
Now let's discuss the bot's ability to avoid obstacles. To do this, we are use three IR sensors to find any possible obstructions in the way of the robot.
The motors are controlled by an Arduino Uno R3, which uses the sensor data to help the bot avoid obstacles.
The code is rather basic and can be divided into three components.
1. Declaration of all the variables and functions that we will be using in the program.
2. Setup function: In this, we declare pins 6, 9, 10, and 11 as output pins, these pins have PWM functionality which means we can control the speed of the bot.
These pins connect to the input pins of the L298 motor driver. Two more GPIO pins have been set to high to provide 5V to the front-mounted IR sensors.
3. In the loop function, we keep reading the analog sensor values from the IR sensors and raising a flag if the bot detects an obstruction.
The potentiometer can be used to tune the sensor to detect an obstacle at a certain distance.
Once an obstacle is detected by the IR sensors, a flag is raised and the program enters a certain loop, in this loop, the bot decides to turn left or right depending on which side the obstacle has been detected.
If the left IR sensor detects an obstruction, the bot will temporarily go backward before turning right.
If the right IR sensor detects an impediment, the bot will temporarily go backward before turning left.
The bot moves back briefly and turns away from the obstacle and starts moving forward again. By default, the bot keeps moving forward until an obstacle is detected.
read our blog explaining the infrared sensor application, which provides detailed information about infrared sensor, including their working principles, types, advantages, disadvantages, and various applications.
Code for the obstacle avoidance Robot
#include

//Declare all the variables being used here:
int centerIR;
int leftIR;
int rightIR;

int leftFlag;
int centerFlag;
int rightFlag;

//Declare all the functions being used here:
void deviateRight();
void deviateLeft();
void forward();
void reverse();
void setup()
{
  // put your setup code here, to run once:
 pinMode(6, OUTPUT);
  pinMode(9, OUTPUT);
  pinMode(10, OUTPUT);
  pinMode(11, OUTPUT);

  pinMode(7, OUTPUT);
  pinMode(8, OUTPUT);

 digitalWrite(7, HIGH);
 digitalWrite(8, HIGH);

  Serial.begin(115200);
}

void loop()
{
  // put your main code here, to run repeatedly:
  centerIR = analogRead(A0);
  leftIR = analogRead(A1);
  rightIR = analogRead(A2);

  if (leftIR < 200)
  {
    leftFlag = 1;
  }
  else
  {
    leftFlag = 0;
  }

 if (rightIR < 200)
  {
    rightFlag = 1;
  }
   else
  {
    rightFlag = 0;
  }

  if (centerIR < 200)
  {
    centerFlag = 1;
  }
  else
  {
    centerFlag = 0;
  }

  if ((leftFlag == 1) || (rightFlag == 1) || (centerFlag == 1))
  {

    if (centerFlag == 1)
    {
      if (leftFlag == 1)
      {
        deviateRight();
      }

      elseif (rightFlag == 1)
        deviateLeft();
      else
        deviateLeft();
    }
    elseif (leftFlag == 1)
    {
      deviateRight();
    }
    elseif (rightFlag == 1)
    {
      deviateLeft();
    }
    else
    {
      deviateLeft();
    }
  }

 else
  {
    forward();
  }
}

//Function definitions go here:
void reverse()
{
  Serial.println("Backing up");
  digitalWrite(9, LOW);
  analogWrite(6, 75);
  analogWrite(11, 75);
  digitalWrite(10, LOW);
  delay(1000);
}

void deviateRight()
{
  Serial.println("Right");
  reverse();
  digitalWrite(6, LOW);
  digitalWrite(9, LOW);
  digitalWrite(11, LOW);
  analogWrite(10, 350);
  delay(300);
}

void deviateLeft()
{
  Serial.println("Left");
  reverse();
  analogWrite(9, 350);
  digitalWrite(6, LOW);
  digitalWrite(11, LOW);
  digitalWrite(10, LOW);
  delay(300);
}

void forward()
{
  Serial.println("Forward");
  analogWrite(9, 75);
  digitalWrite(6, LOW);
  digitalWrite(11, LOW);
  analogWrite(10, 75);
}
Once the code has been uploaded on the Arduino Uno, power on the bot.
Before placing it on the ground, please ensure that the bot is behaving in the way it is intended to, you can do this by waving your hand in front of the IR sensors in the front.
This will ensure that the bot does not get damaged by any obstacles.
read more: Smart Dustbin using Arduino
Conclusion:
Creating an Obstacle Avoidance Robot with Arduino and infrared sensors is an exciting project that blends technology and imagination.
Follow our guide to assemble your robot, set up the necessary parts, and use an IR sensor to help your bot navigate around obstacles. This arrangement allows your robot to traverse its surroundings automatically.
Do not miss the demo video to show your robot in action as it explores its surroundings. If you're ready to get started with programming, our obstacle avoidance code has you covered.
Start today and feel the thrill of robotics for yourself!
If you appreciate our work don't forget to share this post and leave your opinion in the comment box.
Please do check out other blog posts about Popular electronics
Make sure you check out our wide range of products and collections (we offer some exciting deals!)