Logging Your Heart Beat To Cloud With Raspberry Pi & Arduino
In our last post, we showed you how to create a DIY heart rate monitor using an Arduino and a Pulse Sensor Module.
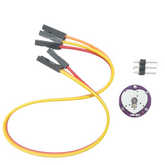
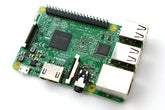
Along with the components required for the heart rate monitor, that is, the Arduino, jumpers and a Pulse sensor module, you will also need a Raspberry Pi and a working internet connection.
The method we’ll be employing to stream the BPM over internet is by programming the Raspberry Pi to read the data from Arduino’s serial monitor and publish it to an online free service like ThingSpeak. This service will allow the user to sign in to ThingSpeak from anywhere around the world and read the sensor data.
Without further ado, let us get started.
Ensure that the Arduino is fully set up and is actively running the "Getting started to BPM" example code.
Browse the Best Selection of Raspberry Pi Camera.
1. Make a ThingSpeak account and a channel to stream data
- Sign up for ThingSpeak (you can follow this link to their website)
- Select the ‘Channels’ page on the top ribbon and click on ‘New Channel’
- Fill in a suitable name and description and click on ‘Save Channel’
- Open your newly created channel and click on ‘API Keys’
- Copy down the key, as this will be required for the Raspberry Pi to connect to your channel
2. Setup the Raspberry Pi
- Make sure your Raspberry Pi is set up in a headless mode and connected to Wi-Fi, so you can connect to your Raspberry Pi remotely via your PC. We’ll be using a software called PuTTY to SSH into your R-Pi. Open PuTTY, type in the IP address your R-Pi is connected and login when prompted for the user ID and password.
- If your Raspberry Pi isn’t set up in headless mode, you can connect you Raspberry Pi to an external display, connect to WiFi, and execute the following instructions via it’s built-in terminal.
- Connect your Arduino to Raspberry Pi using the Arduino’s USB cable
- Navigate to documents by typing the following command
cd Documents
- To create a new python script, execute
- nano heartbeat_streaming.py
- In the nano editor, paste the following code. Make sure that your indentations are correct as the python compiler might later throw an error when you try to run the script.
import serial
import http.client as http
import urllib
ser = serial.Serial('/dev/ttyACM0',9600)
key = "<ENTER YOUR THINGSPEAK KEY HERE>"
def upload_to_ts(val):
params = urllib.parse.urlencode({'field1': val, 'key':key })
headers = {"Content-typZZe": "application/x-www-form-urlencoded","Accept": "text/plain"}
conn = http.HTTPConnection("api.thingspeak.com:80")
try:
conn.request("POST", "/update", params, headers)
response = conn.getresponse()
data = response.read()
conn.close()
except Exception:
print ("Connection failed")
except KeyboardInterrupt:
print ("\nExiting.....")
exit()
while True:
try:
read_serial=ser.readline()
bpm = read_serial.decode('utf-8').strip()
print (bpm)
upload_to_ts(bpm)
except KeyboardInterrupt:
print ("\nExiting.....")
break
- Enter in your ThingSpeak channel key against the Key variable written on the 5th line of the code
- Press Ctrl+X to exit the editor. Press ‘Y’ and ‘Enter’ on the keyboard to successfully save and close your Python nano editor
- Type in the following command to run the code and start publishing data onto your ThingSpeak channel
- python3 heartbeat_streaming.py
- You should be able to see your BPM printed on the Raspberry Pi terminal, and subsequently, your Raspberry Pi will also be sending data to ThingSpeak.com
Note: The free tier in Thingspeak will only allow you to record one data every 15 seconds. In case you need a higher polling rate, you’ll have to opt for a paid tier that will allow you to do so.
The applications of such a project are endless, as it would enable you to monitor health remotely (or realistically anything) from anywhere around the world. So get creative and start building your own IoT projects!


