How to make a laser alarm security circuit on breadboard
Summary
In our latest blog post, we delve into the world of DIY home security with a step-by-step guide on creating a laser alarm security circuit on a breadboard. We start with an introduction to the project, highlighting the importance of home security in today's world. Exploring the essential components and their functions, we simplify the process for even beginners. With detailed instructions on building the circuit, we empower readers to customize and enhance their setup for optimal protection. Join us as we delve into the realm of DIY security solutions, ensuring your peace of mind.
In an era where home security is of utmost importance, the prospect of safeguarding your abode without breaking the bank can seem like a daunting task. Fear not, for the solution lies in the realm of DIY ingenuity. Introducing the homemade laser security alarm system, a project that combines simplicity, affordability, and a touch of geeky brilliance.
The Need for Home Security
Burglaries and intrusions are unfortunate realities that can leave homeowners feeling vulnerable. Traditional alarm systems, while effective, often come with hefty price tags and complex installations. Statistics show that homes without security systems are three times more likely to be targeted by burglars, making the need for an affordable security solution all the more pressing.
This is where the DIY laser security alarm system shines, offering an ingenious alternative that empowers you to take matters into your own hands – quite literally. Not only is it cost-effective, but it also provides a sense of control and empowerment, allowing you to safeguard your home on your own terms.
There's something immensely satisfying about crafting a functional device with your own two hands. It taps into a primal sense of accomplishment, akin to our ancestors fashioning tools and shelter from raw materials. Building your own security system not only saves you a considerable amount of money, but it also instills a sense of pride and a connection to your creation that no off-the-shelf solution can match.
By following this step-by-step guide, you'll learn how to construct a reliable laser security alarm system using readily available electronic components and a good old-fashioned breadboard. The process itself is an educational journey, allowing you to gain valuable knowledge about electronics, circuitry, and problem-solving skills that can be applied to future DIY endeavors.
Understanding the Components:
LDR (Light Dependent Resistor):
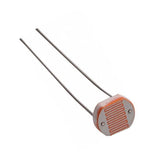
The Sentinel At the heart of this project lies the LDR, or Light Dependent Resistor, a remarkable component that acts as a light sensor. When a laser beam hits the LDR, its resistance changes, triggering the alarm circuit. Think of it as the trusty watchdog, ever vigilant and ready to raise the alarm at the slightest disturbance.
The LDR's sensitivity to light is what makes it the perfect choice for this security system. It reacts instantaneously to changes in light intensity, whether it's a laser beam or a flashlight being shone upon it. This allows for a quick and reliable response, ensuring that any potential intruder is detected without delay.
Essential Components
While the LDR plays the starring role, it's supported by a talented ensemble of components, each with its own unique function and purpose. You'll need an LED (Light Emitting Diode) to provide visual cues, alerting you to the system's status and any potential breaches. The transistor BC547 acts as an amplifier, boosting the signal from the LDR and ensuring that the alarm is triggered with sufficient power.
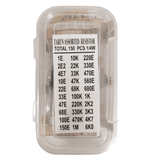
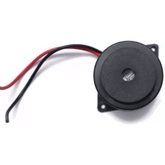
Resistors are the unsung heroes of this project, controlling the flow of current and ensuring that each component receives the appropriate amount of power. The buzzer, of course, is the audible alarm that will sound in the event of an intrusion, alerting you and potentially scaring off any would-be trespassers.
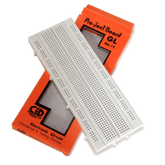
Last but not least, a 9V battery with a holder provides the necessary power to bring your creation to life, while the trusty breadboard serves as the stage upon which your electronic symphony is conducted.
Building the Circuit

Setting Up the Breadboard
The breadboard is your canvas, and the components are your paints. Begin by carefully placing each component in its designated spot, following the provided circuit diagram. This step is crucial, as proper placement ensures the seamless connections and functionality of your security system.
Imagine the breadboard as a miniature city, with each component representing a different building or structure. Just as urban planners carefully consider the placement of buildings and infrastructure, you must thoughtfully arrange your electronic components to create a harmonious and efficient circuit.
Wiring the Components

With your components arranged like soldiers awaiting orders, it's time to connect them according to the circuit diagram. Pay close attention to the transistor's pinout (collector, base, and emitter), as this is the heart of your circuit's operation. Meticulously wire the LDR, LED, resistors, buzzer, and battery to the breadboard, ensuring each connection is secure and precise.
Visualize the wires as the roads and highways that connect the various components of your electronic city. Just as a well-planned transportation network is essential for a city's smooth functioning, your wiring must be carefully executed to ensure that the flow of electricity is uninterrupted and efficient.
Testing and Troubleshooting
Once your circuit is complete, it's time to put it to the test. Connect the battery, and if everything is wired correctly, the LED and buzzer should spring to life. Now, focus a laser or strong light source on the LDR to see if the alarm deactivates. If not, don't panic – retrace your steps, double-check your connections, and troubleshoot any issues until your DIY masterpiece responds as intended.

Troubleshooting is an essential part of the learning process, and it's during these moments that you'll truly appreciate the ingenuity and problem-solving skills required to bring a project to life. Think of it as debugging your electronic city, identifying and resolving any issues that may arise to ensure smooth operation.
Customizing and Enhancing:
Adjusting Sensitivity
Like a finely tuned instrument, your laser security alarm system can be adjusted to suit your specific needs. Experiment with different resistor values or explore alternative LDR models to fine-tune the sensitivity of your system, ensuring optimal performance in various lighting conditions.
Perhaps you live in an area with a lot of ambient light, or maybe you prefer a more sensitive system that can detect even the slightest disturbance. By adjusting the resistance values, you can calibrate your security system to strike the perfect balance between sensitivity and reliability, tailoring it to your unique environment and preferences.
Adding External Triggers
Why stop at a laser beam? Expand the functionality of your security system by incorporating additional triggers, such as motion sensors or door/window contacts. This way, your home's defenses are fortified from multiple fronts, creating a truly comprehensive security solution.
Imagine a scenario where your laser security alarm is coupled with motion sensors strategically placed around your property. Any potential intruder would be faced with a formidable gauntlet of detection methods, significantly increasing the chances of apprehension and deterring even the most determined trespassers.
Integrating with Smart Home Systems
In the age of smart homes and home automation, your DIY laser security alarm system can be the centerpiece of a truly modern security solution. Explore ways to integrate your creation with existing smart home systems or platforms, granting you remote monitoring and control capabilities – the epitome of convenience and peace of mind.
Envision being able to receive real-time alerts on your smartphone whenever your security system is triggered, or even being able to arm and disarm it remotely. With the integration of smart home technology, your DIY project transcends its humble beginnings and becomes a cutting-edge security solution rivaling commercial offerings.
Conclusion
Throughout this comprehensive guide, you've learned how to build a functional laser security alarm system using readily available electronic components and a trusty breadboard. By following the step-by-step instructions, you've unlocked the ability to create an affordable and effective home security solution tailored to your unique needs.
But this project is more than just a practical security measure – it's a testament to the power of DIY ingenuity and the satisfaction that comes from creating something with your own hands. From understanding the intricacies of electronic components to mastering the art of circuit building, you've acquired invaluable skills that can be applied to countless future endeavors.
The world of electronics and home automation is a vast playground ripe for exploration, and this project is merely the first step on an exciting journey. Embrace your newfound DIY skills and continue experimenting with different components and projects. Who knows what innovative creations you might bring to life next?
Perhaps you'll venture into the realm of Arduino or Raspberry Pi, unlocking a whole new world of programmable electronics and automation possibilities. Or maybe you'll delve into the fascinating world of 3D printing, combining your newfound electronic prowess with the ability to create custom-designed housings and enclosures for your creations.
Remember, the true reward lies in the journey itself – the satisfaction of crafting something extraordinary with your own hands. Embrace the DIY spirit, and let your imagination soar as you embark on a path of endless possibilities.


