How to connect the Arduino to Blynk
Summary
Take your Arduino projects to the next level by connecting them to Blynk with our detailed guide. Start with an introduction to Blynk, a powerful IoT platform. Learn how to set up your Blynk account and install the Blynk library in the Arduino IDE. Follow step-by-step instructions to connect your Arduino board to WiFi and link it to your Blynk project. This guide is perfect for beginners and experienced users looking to add remote control and monitoring to their Arduino creations. Click now to start your IoT journey with Blynk and Arduino!
INTRODUCTION:
The Internet of Things (IoT) is rapidly expanding, resulting in an explosion of linked gadgets that make our lives easier by providing smarter and more automatic functions. Among the several platforms for constructing IoT projects, Blynk stands out as a popular option, allowing users to remotely operate hardware, monitor data streams, and effortlessly link to a variety of internet services.
Individuals who integrate Blynk with the highly recognized Arduino microcontroller enter a domain overflowing with innovative opportunities, appealing to both DIY enthusiasts looking to explore new endeavors and professionals looking to optimize their operations.
Through this powerful amalgamation, one gains access to a dynamic toolkit for crafting engaging and efficient solutions that cater to a broad spectrum of needs and applications within the IoT domain.

The harmonic collaboration between Blynk and Arduino exemplifies the ongoing progress of technology, signifying the seamless integration of innovation and utility to propel the Internet of Things ecosystem to unprecedented levels of sophistication and usefulness. This excellent collaboration not only demonstrates the limitless possibilities created by combining cutting-edge technology with innovative solutions, but it also emphasizes the critical role that creativity plays in transforming our digital landscape.
By leveraging the synergistic link between Blynk and Arduino, we see a revolutionary synergy that not only redefines established connectivity paradigms but also prepares the road for groundbreaking advancements in IoT application development. Furthermore, the seamless collaboration between Blynk and Arduino demonstrates the revolutionary power of merging cutting-edge technologies to accelerate the evolution of connected products.
This marriage represents a huge step forward in the evolution of IoT systems, firmly establishing them as essential components of modern technological ecosystems. Blynk and Arduino work together to empower individuals to go on a journey of discovery and creativity, allowing them to leverage IoT's full potential to solve challenging challenges and elevate user experiences across multiple industries. In essence, the collaboration between Blynk and Arduino captures the essence of growth in the tech industry, demonstrating the seamless marriage of imaginative thought and practical functioning that drives the continual advancement of IoT technology
Set Up Your Blynk Account
Step 1:Parts
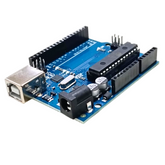
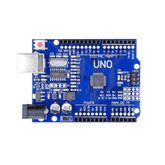
- Arduino Uno
- android phone & computer.
- LED's
- Latest Arduino ide

Step 2: Download the Required Application
-
Download the Blynk Application
We can easily download the application from the Playstore and Apple App Store.
-
Create the account
First they have to start the Blynk application on their smart phone device that is to be used for accessing and controlling the hardware. Unfortunately, in case you have not used the program before, then you need to register first before being able to proceed.
This registration procedure requires you to provide your email address. Alternatively, you may join up using your Facebook account, which is a simple and quick registration approach. Furthermore, you may register using your Google account, which provides more flexibility and convenience.
Using any of these ways throughout the sign-up procedure will allow you to successfully establish your account and receive access to the blynk application's various features and functions. Remember, this first registration step is critical to ensuring a unique and tailored experience within the program based on your choices and requirements.
Create new account
To start a new project, tap the "+" button after you've logged in. Give your project a name, choose your device (Arduino), and the connection method (WiFi, Bluetooth, etc.). Blynk will then generate an Auth Token for your project and send it to the email address you registered with. This token is needed for connecting your Arduino to your Blynk project.
With Blynk's easy interface and extensive widget library, you can explore a universe of limitless possibilities and realize the full potential of IoT technology. The combination of Blynk and Arduino removes traditional obstacles to hardware and software integration, allowing you to go on a journey of creativity and discovery in which your imagination is the only limit.
Install the Blynk Library in Arduino IDE
For the connection of the Arduino to the Blynk we need to download the library in the Arduino Intergrated Development Environment (IDE)

Steps
-
Open the application Arduino IDE:
If you don't already have it, go to the official website at https://www.arduino.cc/en/software to download and install.
-
Install the Blynk Library:
- Go to sketch then we can see the option called include library after entering the include library go to Manage libraries
- After entering the library manager search for the Blynk in the search bar
- Find the Blynk library in the list and click "Install" by Volodymyr Shymanskyy.
-
Include the Library in Your Sketch:
To require the Blynk library in the Arduino program Corrrectly, you should include it at the start of your program. It is always recommended to put the Blynk library on the initial part of your Arduino sketch since it can help you avail functions and features that will better develop the capabilities of your project.
This is easily performed by including a specific line of code from the Blynk library documentation. Taking this initial step lays the framework for easy communication between your Arduino board and the Blynk platform, allowing you to interact with a variety of digital and physical aspects in real time. To establish a robust connection between your hardware and the Blynk library, insert the code snippet carefully.
Cpp:
#include <BlynkSimpleEsp8266.h>
Thus, together with Blynk’s rich-set of tools and features available at your command-r, you can experiment, tweak and build further and cast the innovative frontier of what can be done in the field of IoT projects.
Whether you are a seasoned developer or new to the field of hardware programming, the Blynk and Arduino pair provides a friendly environment that fosters discovery and progress, allowing you to realize your most ambitious ideas.
Connect Your Arduino Board to WiFi
You might be employed on an Arduino board, with constructed-in WiFi like the ESP8266 or ESP32. If you are not using a different board then it must be slightly different from what is described above.
Connect Your Arduino to Your Computer:
Use a USB cable to connect your Arduino board to your computer.
Open a New Sketch:
In the Arduino IDE, open a new sketch by going to File and then move to new option
Configure Your WiFi Credentials:
For your sketch you will have to input your WiFi network’s name or Service Set Identifier (SSID) as well as the password.
char ssid[] = "YourNetworkSSID"; # Replace with your WiFi SSID
char pass[] = "YourNetworkPassword"; #Replace with your WiFi password
Set Up the Blynk Connection:
In the setup function of your sketch, initialize the Blynk connection using your Auth Token. Add the following code to your sketch:
char auth[] = "YourAuthToken"; #Replace with your Blynk Auth Token
void setup()
{
Serial.begin(115200);
Blynk.begin(auth, ssid, pass);
}
void loop()
{
Blynk.run();
}
Link Your Arduino to Your Blynk Project
Configure Widgets in Blynk App:
Upon installing the Blynk application, launch the project related to your Arduino and place widgets for controlling or monitoring the latter. For instance, a Button widget can be used to control an LED, allowing it to turn on and off; a Gauge widget may be used to display the reading from a sensor.
Assign Virtual Pins:
Each widget in Blynk is assigned a virtual pin. To utilize a certain virtual pin, touch on the widget and enter the pin number. For example, utilize virtual pin V1 with the Button widget.
Write Arduino Code for Widgets:
Add virtual pin handling code to your Arduino program. To operate an LED linked to digital pin 13 using a Button widget on virtual pin V1, use the following code:
#define LED_PIN 13
BLYNK_WRITE(V1)
{
int pinValue = param.asInt(); // Get value from the Blynk app
digitalWrite(LED_PIN, pinValue); // Set LED state
}
void setup()
{
Serial.begin(115200);
Blynk.begin(auth, ssid, pass);
pinMode(LED_PIN, OUTPUT);
}
void loop()
{
Blynk.run();
}
Upload the Sketch:
To upload the sketch to your Arduino board, use the Arduino IDE's "Upload" button. After the upload is complete, your Arduino should connect to the WiFi network and the Blynk server.
Unlocking the power of your Arduino device with Blynk's adaptable platform not only changes the way you interact with technology, but it also opens the door to limitless possibilities for creating interconnected, intelligent systems that improve the quality of your everyday life. Embrace the future of IoT innovation by using Blynk and Arduino as dynamic tools to create a smarter, more connected world.
Conclusion:
Well done for establishing a connection between your Arduino and Blynk — the groundbreaking digital toolbox that allows you to control your Arduino device from afar and track the readings of the attached sensors using the Blynk app. Thus, alongside with Arduino, Blynk offers a plethora of opportunities for your IoT initiatives which profoundly change the ways of dealing with and controlling the connected world.
However, Blynk sets an upper edge in using the features offered by it such as its sleek interface and a greater number of options in the selection of widgets making it easy to create better IoT applications without the need for explicit coding knowledge. Whether you are working on an elaborate smart home network in the making, a comprehensive weather station, or even on a splendid remote-controlled robot, you are inclined towards developing those projects based on Blynk and Arduino as the ideas shared here give a very strong platform to build upon.
For this reason, Blynk differentiates itself from the other IoT platforms in ways such as: offering a basic interface and a multitude of widgets to modify. Consequently, this blend enables customers to develop elaborate IoT applications without worrying about profound coding expertise, and therefore, is appropriate for both conventional and first-time developers.
Whether you are exploring how to establish a smart home network with quite a number of connected devices, whether designing a weather monitoring system, or whether employing the revolutionary process of constructing a distant operated robot, the simplicity of integrating Blynk to Arduino reveals itself as the most convenient solution.Blynk with Arduino's excellent synergy provides a solid and adaptable foundation for bringing your concepts and ideas to life.


