How Do I Check The Health Of My SD Card On My Raspberry Pi?
Summary
In the world of Raspberry Pi, where small computers work like big computers, the memory card is like a superhero. It holds all the important things that make your Raspberry Pi work. But, just like a superhero needs care, your memory card needs monitoring to stay strong. This blog is the proper guide to understanding and checking your memory card's health. Whether you're an expert or just starting, knowing how to do this helps you to keep your Raspberry Pi running smoothly. So, read the blog and learn the tricks to ensure your Raspberry Pi's memory stays in good shape, and ensuring it performs at its best every time.
Introduction
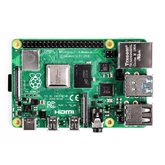
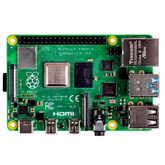
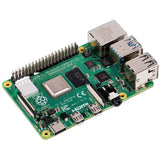
In 2012 a UK-based non-profit organization named Raspberry Pi Foundation shocked the world by launching Raspberry Pi a credit card-sized single-board computer at a very low cost. The Raspberry Pi runs on a Broadcom system-on-a-chip (SoC), which has a CPU, GPU, and RAM.
It supports various operating systems like Windows 10 IoT Core, Raspbian, and Ubuntu. This mind-blowing single-board computer helps you to learn programming skills, do home automation, build hardware projects, build cool games and gadgets, and also many more. If you are a DIY-enthusiastic this tiny computer is your key to learning, innovating, and turning your idea into reality.
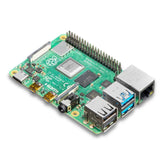
Experience smooth computing with Raspberry Pi 4 2GB RAM!
Importance to Monitor SD Card Health of Raspberry PI:
SD Card health monitoring is crucial because it ensures smooth performance and increases the longevity of your Raspberry Pi device. If you are not monitoring your SD card it can be a threat to your Raspberry device and can cause various problems such as system crashes, slow performance, and data corruption. So, that's why it is important to monitor your SD card to secure your projects from those threats and detect early signs of failures.
How To Monitor SD Card Health on Raspberry Pi?
So, you understand why you need to monitor SD card health on Raspberry Pi. Now it's time to understand how can you monitor your SD card health on Raspberry Pi. There are various methods to monitor SD card health which depend on your preferences and requirements. There are a variety of methods to do it out of those we will talk about 3 effective and easy-to-learn methods.
Explore wide range of Raspberry Pi Keyboards & Mouse with Best Prices.
Method 1: Running File System Check (fsck Command)
The fsck command is a tool that examines and fixes irregularities in file systems. It's advisable to execute this command before mounting any file system. It's important to have read access to the device file associated with the file system, such as the /dev/hd0 device.
There are various situations in which you might find it necessary to employ fsck. This command is particularly useful if your system facing booting issues, external drives or storage media are not working correctly, or if you've observed signs of file corruption. It works as a "front-end" tool, serving as an interface for several file system-specific checkers like fsck.vfat, fsck.ext2.
By using the file system check (FSCK Command) you can easily fix bad blocks, errors, and other issues. There are 3 steps for checking the health of your SD card on Raspberry PI. Such as-

- Step 1: First you need to open the terminal on your Raspberry PI or connect your Raspberry PI remotely using SSH. Then type sudo umount /dev/mmcblk0p2 and press enter. By following this command you can unmount the partition which contains the root file system. This root file system is mainly located on the second partition of an SD card. While typing the command ensure that your SD card is not in use by unmounting it.
- Step 2: After completing the step 1 type sudo fsck /dev/mmcblk0p2 and enter. It will run the fsck on the root file system partition and gives you the results. If the file system check (fsck) founds any issues or errors it will prompt you to fix those issues. You can easily fix those issues by following on-screen instructions.
- Step 3: When you complete these 2 steps it means your SD card is checked and repaired and you can use it without worries. But before finishing it you need to mount it again. To do that just type sudo mount -a and press enter. This command mounts the partition which contains the root file system on the SD card.
read our blog about raspberry pi alternatives, which provides a comprehensive overview of alternative single-board computers to Raspberry Pi. It discusses various options.
Method 2: Download and Install H2testw
H2testw is a Microsoft Windows program designed by Harald Bögeholz in Germany. This application allows users to test USB flash disks and various other media devices. It offers the convenience of running in English, and it is both independent and freely available for users.
H2testw is a great software for checking your SD card for errors. This process can take several hours, and the time depends on the size of your SD card.
H2testw provides the capability to assess the read and write performance of storage devices accurately. It allows users to determine the actual data capacity that a storage device can handle. This functionality extends to various storage mediums, including network drives, hard drives, SD cards, and USB sticks. To use this H2testw software for checking the health of your SD card you need to follow 3 steps, such as-

- Step 1: First go to the official website of H2testw then download and install it on your device. Now connect the SD card to a Windows computer by using a card reader.
- Step 2: After completing the first step open the software H2testw then select your SD card from the dropdown list. To start the test just simply click on the write+verify button.
- Step 3: Just wait for some time for H2testw to complete the test. H2testw may take some minutes or hours based on the size of your SD card. After completing the test, you can get the proper report of issues or errors.
read our blog explaining the raspberry pi projects for beginners, which explores various projects suitable for individuals starting with Raspberry Pi. It covers a range of projects
Method 3: Use SD Memory Card Formatter Software
The SD Memory Card Formatter is a tool designed to format SD Memory Cards, SDHC Memory Cards, and SDXC Memory Cards complying with the SD File System Specification established by the SD Association (SDA). This formatter ensures that the formatting process aligns with the standards set by the SD Association for optimal compatibility and performance of SD cards.
SD Memory Card Formatter can also help you to identify and fix certain SD card issues. The SD Card Formatter can check and fix various types of issues including bad sectors, file system errors, and partition table corruption. There are also 3 steps for monitoring the health of your SD card by using SD Memory Card Formatter software. such as

- Step 1: Go to the official website of the SD card formatter then download and install the software.
- Step 2: Then connect the SD card to a Windows computer by using a card reader. Now open the SD card formatter and select your SD card from the dropdown list. Then select the quick format option and click on the format button.
- Step 3: Just wait for few times for the SD Memory Card Formatter to complete the formatting and then check for the issues and errors on your SD card.
Conclusion:
The importance of monitoring SD card health is emphasized, as it directly correlates with the device's performance and longevity. Various methods are explored to achieve this, with a focus on four effective and easy-to-learn techniques.
The first method involves utilizing the fsck command, the second method introduces H2testw, and the third method introduces the SD Memory Card Formatter.
This blog equips readers with the knowledge and tools necessary to monitor and maintain the health of your Raspberry Pi's memory card. By following the outlined methods, you can proactively safeguard your projects, detect early signs of failures, and ensure that your Raspberry Pi continues to operate at its best and bring your innovative ideas to life.


