How to use beaglebone black
Summary
Explore the capabilities of the BeagleBone Black with our all-in-one guide. Start with an introduction to this powerful single-board computer and its versatile applications. Get a detailed hardware overview, understanding its key components and features. Dive into the software aspects, including operating system options and essential tools. Learn the basics of programming and development on the BeagleBone Black, with practical tips and examples. Perfect for both beginners and seasoned developers, this guide will help you harness the full potential of your BeagleBone Black. Click now to embark on your development journey!
Introduction
To specify, numerous enthusiasts, engineers and developers have been enchanted by the BeagleBone Black, which is an affordable ARM computer running on Linux. In terms of computing power, this small board is equipped with a 1GHz processor and Internet link and it also has a microSD card port thus it can handle as much memory as it can physically fit and in itself is a rather powerful personal computer.
Besides that, it looks great – as if it was designed to be a part of a futuristic cityscape, with those silky smooth edges It has an input and output extension arm patrol along with multiple interfaces that can be used to connect various devices and support a variety of communication protocols – there’s a list of them at the end of this page, feel free to have a look. This rebalances the knowledge discrepancy between electronics and computing.

Hardware Overview
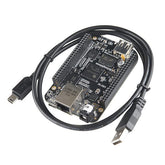
The BeagleBone Black is a lightweight but fully equipped development board to provides the highest functionality for any usage type. As with any engineering board, comprehending the specifications of the BeagleBone Black’s hardware is a prerequisite for maximizing its performance in your endeavours.
Buy BeagleBone Black Rev C – Perfect for developers!
Processor:
Tucked inside the BeagleBone Black is Texas Instruments' AM335x ARM Cortex-A8 CPU. This 1GHz CPU offers sufficient processing capability for a wide range of applications, including sophisticated data processing, multimedia, and simple automation projects. An appropriate option for embedded systems is the ARM Cortex-A8 architecture, which is renowned for its performance and efficiency.
Memory :
- RAM: The 512MB of DDR3L RAM that the BeagleBone Black has to provide is more than enough to run Linux-based operating systems and handle light multitasking applications.
- 4GB of eMMC flash storage are built into the board. The operating system and apps are installed on this internal storage. To further enhance flexibility for larger projects and data-intensive applications, the microSD card slot facilitates extra storage options.
Connectivity:
- USB 2.0 host and micro-USB client ports are available on the BeagleBone Black. Hardware peripherals like keyboards, mice, and Wi-Fi adapters can be connected to the host port, while data and power are transferred via the client port.
- Network connectivity is made possible with a 10/100 Ethernet port, which allows for dependable and quick wired connections. For applications like servers and IoT gateways that need reliable network access, this is very helpful.
- Displays and monitors can be connected to the BeagleBone Black via the micro-HDMI connection, which offers both video and audio output. For graphical user interfaces, presentations, and multimedia apps, this is helpful.
I/O pins:
The wide variety of input/output (I/O) ports on the BeagleBone Black is one of its best qualities; it makes interacting with different sensors, actuators, and other hardware elements easy.
- GPIO Pins: There are 65 digital I/O pins on the board that may be set up as input or output. Numerous digital gadgets and sensors can be interfaced using these pins.
- Analog Inputs: Seven analogue inputs that can read voltages between 0 and 1.8 volts are available. They are helpful for integrating with analogue sensors, like potentiometers and temperature sensors.
- Pulse width modulation (PWM): The BeagleBone Black has multiple pins that support PWM, which enables variable precision control of devices such as motors and servos.
- I2C, SPI, and UART: These are only a few of the several communication protocols that are supported. Various peripherals such as displays, sensors, and other microcontrollers can all be communicated using these interfaces.
Power Source:
Mini USB or 5V DC jack
Operating System:
Linux, Debian One of the advantages of this board over a Raspberry Pi is that it requires very little hardware to set up, you only need the following accessories:
- BeagleBone Black Rev. C
- Mini USB Cable
- MicroSD Card (Optional, you can use the onboard storage)
- Ethernet (Optional, but recommended)
Software Overview
The current update of BBB includes Debian and that is the preferred Operating System for your board. If you still have Ångström installed on the board, then it is highly recommended to get the newest Debian image and write it to your microSD or internal firmware Memory using these instructions.
Setting Up the Board
Before you get started with your BeagleBone Black, it arrives in a box with everything that you would need. Take your BBB in one hand and the Mini USB cable that you were provided with when you purchased your BBB; now connect your BBB to your computer. In less than 15 seconds the LED Board is ready for use by your student or any other user.
Installing your drivers
Follow these steps to install your BeagleBone Black’s drivers: Follow these steps to install your BeagleBone Black’s drivers:
- Click on ‘My Computer’ on the Start menu, or open the folder system of your operating system.
- Right-click the “BeagleBone Getting Started” folder and select “Open with” clicking it twice.
- Open the START.htm web page in your default web browser.
- go to “Step 2: Install drivers“ on the web page.
- In the START.htm web page a table that lists the various operating systems and their USB drivers, Just choose the required USB drivers for your OS and download them and then follow the basic steps for installing the drivers.

Programming and Development
Python Programming
One of the most commonly used programming languages for BeagleBone Black is Python as this language is easy to use and quite popular.
Blinking an LED
Here’s how to blink an LED connected to GPIO pin P8_12:Here’s how to blink an LED connected to GPIO pin P8_12: Connect the LED: Link the first or anode terminal of the LED to the P8_12 and the second or cathode terminal to any ground pin via a resistor.
Install Adafruit_BBIO Library: Unlike traditional methods this library makes GPIO manipulation quite easy.
- Run these commands:
sudo apt-get update
sudo apt-get install python3-pip -y
sudo pip3 install Adafruit_BBIO
- Write the Script:
import Adafruit_BBIO.GPIO as GPIO
import time
LED = "P8_12"
GPIO.setup(LED, GPIO.OUT)
try:
while True:
GPIO.output(LED, GPIO.HIGH)
time.sleep(1)
GPIO.output(LED, GPIO.LOW)
time.sleep(1)
except KeyboardInterrupt:
GPIO.cleanup()
- Run the Script:
Save the script as blink.py and run it:
python3 blink.py
Using BoneScript
BoneScript is a Node. js library that contains the drivers specifically for BeagleBone family of boards. Tyrell Software 2012 is pre-installed on the BBB and must be configured to make additional changes.
In the following example we explain how to use the BoneScript to enable and disable an LED. Open Cloud9 IDE: To make development easier, the BeagleBone Black has Cloud9 IDE preloaded. Access it by navigating to http://168. 7. 2:3000 in it or to download it and open it in your web browser.
Create a New File: To create a new JavaScript file, open your editor and enter the file name Blink in the lower left corner, and click create Then select JavaScript for the file type. Js.
• Write the Script:
var b = require('bonescript');
var led = 'P8_12';
b.pinMode(led, b.OUTPUT);
setInterval(toggle, 1000);
function toggle() {
b.digitalRead(led, function(x) {
b.digitalWrite(led, x.value ? b.LOW : b.HIGH);
});
}
• Run the Script:
In the Cloud9 IDE, click the "Run" button to execute the script.
Accessing I2C Devices
The BBB supports I2C, allowing you to interface with a variety of sensors and peripherals.
Reading from an I2C Sensor
Connect the Sensor: Connect your I2C sensor to the BBB's I2C pins. Install i2c-tools: sudo apt-get install i2c-tools
- Write a Python Script:
import smbus
import time
bus = smbus.SMBus(2) # I2C bus number
address = 0x48 # I2C address of the device
def read_temperature():
temp = bus.read_byte_data(address, 0)
return temp
while True:
temperature = read_temperature()
print("Temperature: ", temperature)
time.sleep(1)
Using SPI Devices
SPI is another communication protocol supported by the BBB. Communicating with an SPI Device Connect the SPI Device: Connect your SPI device to the BBB's SPI pins.
Enable SPI:
sudo config-pin P9_18 spi
sudo config-pin P9_22 spi_sclk
- Write a Python Scrip
import spidev
spi = spidev.SpiDev()
spi.open(1, 0) # Open bus 1, device (CS) 0
spi.max_speed_hz = 5000
def read_channel(channel):
adc = spi.xfer2([1, (8 + channel) << 4, 0])
data = ((adc[1] & 3) << 8) + adc[2]
return data
while True:
value = read_channel(0)
print("SPI Read Value: ", value)
Conclusion:
In some aspects, one cannot deny the fact that the BeagleBone Black comes up with a diverse feature set and connectivity options that make it a perfect fit for any given project. Even for a few basic GPIO pin controls to the complex interface bus like I2C and SPI, BBB has a great deal to offer you. If you have followed this guide, you should be well equipped to design and executing application on BeagleBone black. Happy coding!


