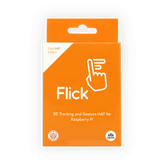
FLICK HAT : 3D TRACKING & GESTURE CONTROL

FLICK HAT  3D TRACKING & GESTURE CONTROL

We are used to controlling our computers using a mouse. What if we could do the same with our fingers, without any mouse? And what if we can give inputs, not just in a two-dimensional space, but in a three-dimensional one? Does all this seem unbelievably cool and exciting enough to make you want to get a hands-on experience of? If your answer is “Yes!”, then you have come to the right place.


Flick HAT is an electrical field based 3D Tracking and Gesture Control Device which uses a MGC3130 capacitive sensor chip. It enables user command input with natural hand and finger movements. Applying the principles of electrical near-field sensing, the MGC3X30 contains all the building blocks to develop robust 3D gesture input sensing systems.

Flick HATFlick HAT


The details and the library package of the HAT is available as a repository on GitHub.


The Flick library can be installed by running the following command in the terminal window:

curl -sSL https://pisupp.ly/flickcode | sudo bash


After installing the complete package in the Raspberry Pi system, we can check our Flick HAT with a few available demo programs which are provided to us by the Raspberry Pi Supply people. Although these people have been generous to provide us with some really nice sample programs (like controlling a robotic arm or volume of the R-Pi), most of these programs will not work with just the Flick HAT. So, we choose to run ‘flick-demo’ which takes us to an interface which contains the x, y, z coordinates and some other parameters. As we move our hand above the HAT, we will see the corresponding parameters change on the screen. Note that the range is only 15 cm.


We can also try some more interesting stuff, like changing images on the screen using hand gestures. For this, I used the ‘uinput’ library and the ‘flick’ function from the flick library. We emulate the left and right arrow keys of the keyboard and let that execute according to the left or right flick through our palms above the Flick HAT. This will be formulated in an if-else block in the python script file. Now, open some images and see them changing as you hover your hand over the HAT.


Hope this was interesting and learning for you. Thank you


You may also like to read

  • How to use Jetson Nano

    How to use Jetson Nano

    - Robocraze -

    Unlock the power of AI with our comprehensive guide on using Jetson Nano. Start with an introduction to this compact...

    How to use Jetson Nano

    - Robocraze -

    Unlock the power of AI with our comprehensive guide on...

  • How to use raspberry pi

    How to use raspberry pi

    - Robocraze -

    Unlock the potential of your Raspberry Pi with our comprehensive guide. Start with an introduction to the Raspberry Pi, its...

    How to use raspberry pi

    - Robocraze -

    Unlock the potential of your Raspberry Pi with our comprehensive...

  • How to connect the Arduino to Blynk

    How to connect the Arduino to Blynk

    - Robocraze -

    Take your Arduino projects to the next level by connecting them to Blynk with our detailed guide. Start with an...

    How to connect the Arduino to Blynk

    - Robocraze -

    Take your Arduino projects to the next level by connecting...

  • What is Microcontroller 8051

    What is Microcontroller 8051

    - Robocraze -

    Explore the world of the 8051 microcontroller with our comprehensive blog. Start with an introduction to this classic microcontroller, widely...

    What is Microcontroller 8051

    - Robocraze -

    Explore the world of the 8051 microcontroller with our comprehensive...

Frequently Asked Questions

Back to blog

Leave a comment

Please note, comments need to be approved before they are published.

You may also like to read

  • How to use Jetson Nano

    How to use Jetson Nano

    - Robocraze -

    Unlock the power of AI with our comprehensive guide on using Jetson Nano. Start with an introduction to this compact...

    How to use Jetson Nano

    - Robocraze -

    Unlock the power of AI with our comprehensive guide on...

  • How to use raspberry pi

    How to use raspberry pi

    - Robocraze -

    Unlock the potential of your Raspberry Pi with our comprehensive guide. Start with an introduction to the Raspberry Pi, its...

    How to use raspberry pi

    - Robocraze -

    Unlock the potential of your Raspberry Pi with our comprehensive...

  • How to connect the Arduino to Blynk

    How to connect the Arduino to Blynk

    - Robocraze -

    Take your Arduino projects to the next level by connecting them to Blynk with our detailed guide. Start with an...

    How to connect the Arduino to Blynk

    - Robocraze -

    Take your Arduino projects to the next level by connecting...

  • What is Microcontroller 8051

    What is Microcontroller 8051

    - Robocraze -

    Explore the world of the 8051 microcontroller with our comprehensive blog. Start with an introduction to this classic microcontroller, widely...

    What is Microcontroller 8051

    - Robocraze -

    Explore the world of the 8051 microcontroller with our comprehensive...