Easy experiments which can be performed using IOTIF
Summary
Explore the world of IoT with the blog "Easy Experiments with IoTIF." Dive into the basics with Drag and Drop programming, unraveling the potential of IoTIF. Experience hands-on learning with experiments like toggling LEDs, setting up a burglar alarm, and even creating an automatic garage door opener. From controlling LED brightness to playing Scratch games, each experiment unveils the magic of IoTIF. Don't miss the LED game "Find the Hedge Hog." Elevate your IoT skills with these 12 experiments, making technology accessible and fun. Read on and unlock the possibilities of IoTIF in this click-worthy journey!
Introduction:
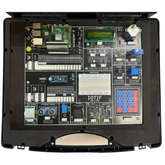
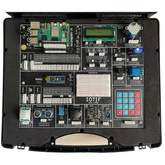
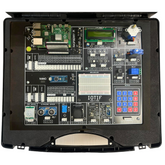
‘Internet of Things’, more commonly known as IoT, is a modern technology that most of the Companies have started researching on for the development of powerful products. IoT is creating a sensation all over the World because of its vast applications in major fields like Automobiles, Manufacturing, Healthcare and Smart Cities. Exciting right? We have a single board that consists of all the required components called IOTIF. In simple words IOTIF is a well packaged, portable learning, its versatility allows it to be used by all age groups and various experience levels. In this blog we will talk about 11 experiments that can be performed using IOTIF for beginners.
Drag and Drop programming
Drag-and-drop programming, also known as visual programming, is a method of creating software applications by dragging and dropping visual elements instead of writing code, This allows for a more innovative learning for beginners and we are using a PictoBlox application to do so, PictoBlox is coding education software that uses both graphical block-based coding and Python programming. With a user-friendly interface and drag-and-drop functionality, it is the ideal companion for setting the first step into the world of programming.

Experiment 1: Toggle LED
This experiment is a basic introduction to digital input and output, often used in electronics and programming education, this experiment will serve you as a base to understand Drag and Drop programming as well as getting familiarized with your IOTIF kit. This simple experiment involves a single led to turn on and off in set interval of time
Experiment 2: Toggle Led using push button
An experiment to toggle an LED using a push button is a common and simple project for beginners in Drag and Drop programming. This experiment involves wiring a push button and an LED, and the LED state is toggled each time the button is pressed.
You will have to open PictoBlox, write a code by initializing the variables, define the state of the pushbutton, assign the LED values according to the state of pushbutton. Now you can see the LED glow every time the button is pushed, you can always improve the experiment by adding delays, varying the intensity etc... the customization is vast and endless.
Experiment 3: Burglar alarm
This experiment will show you the working of a PIR sensor and help you in learning the basics of Drag and Drop programming. Keeping your house safe is always at most priority, well this experiment does the job for you by producing an alarming sound with the help of a buzzer with an entry of burglars.
Open the PictoBlox and make a code such a way that the buzzer goes off when the PIR sensor detects a motion, keep this system turned on while leaving your house or even while going to the bed and now your house is absolutely safe.
Experiment 4: Servo Sweep
The servo sweep experiment is a simple and popular project that involves controlling a servo motor to make it sweep or rotate back and forth within a specified range. This experiment is an excellent way for beginners to learn how to interface a servo motor with an Arduino and control its movement and you can do this by simple drag and drop programming. Using PictoBlox provide the GPIOs and assign servo, now increment the value of variable and assign the servo value accordingly.
Now you can control the angle the servo motor rotates. This has various applications Solar Tracker, automatic pet feeder where the servo angle determines the amount of food etc.
Experiment 5: Parking sensor
We all would have seen our parents face difficulties in parking and this experiment servers as a solution to it, and it’s even better that you built it. This experiment shows you the working of an ultrasonic sensor and how it can be used to aid parking. An ultrasonic sensor works on the principle of sending out a sound wave and measuring the time it takes for the wave to bounce back after hitting an object, so this experiment is based on how close an object is to ultrasonic sensor, closer the object louder the buzzer beeps and brighter the LEDs blink.
Arduino IDE.
The Arduino Integrated Development Environment (IDE) is a software application that provides a user-friendly platform for programming and uploading code to Arduino microcontroller boards. It simplifies the process of writing code, compiling it, and uploading it to the Arduino board, making it accessible for beginners and experienced developers.
Experiment 6: Displaying Temperature and Humidity
Want to make your own temperature and humidity sensor that shows digital reading? Well IOTIF got you covered, IOTIF comes with DHT11 sensor, LCD displays and it’s easy user interface is here to save your day. Use your IOTIF, connect the DHT11 sensor and LCD screen connections, type in the simple code in Arduino IDE, upload. The DHT11 sensor will return the temperature and humidity data and the Arduino will send it to LCD screen via I2C, and done. Now you have your very own Humidity and Temperature sensor
Experiment 7: Control LED brightness using PWM
We all have gone through the lights being very bright so this experiment will help you to learn how to control its brightness. Pulse Width Modulation (PWM) is a modulation technique used in electronic systems to control the average power delivered to a load by varying the width of pulses in a digital signal.
Experiment 8: Automatic garage door opening
Want a warm welcoming every time you enter your garage? The garage door automatically opening and a welcome message of choice, sounds good right. Let us build on the idea using our IOTIF. This experiment uses ultrasonic sensor to detect an object at minimum threshold value, the arduino sends a command to the stepper motor to open the garage door and LCD displays the message of your choice. Now build this idea into a reality and have the warm welcome every time.
Experiment 9: Control buzzer by Keypad
This is a very simple experiment that will allow you to control the buzzer based on the number pressed on the keypad , what more? You can make your own rhythm by pressing the keypad numbers in a pattern. Can try to make a musical instrument out of IOTIF
Scratch with Raspberry Pi
Scratch uses a visual programming environment where users drag and drop code blocks, representing programming constructs, to create scripts. This makes it accessible to beginners and helps them focus on logical thinking and problem-solving without being overwhelmed by syntax.
When you open your IOTIF you can see the shiny green circuit board of Raspberry Pi, it invites you start programming, and create your own software with it. Raspberry Pi it is developed by Raspberry Pi Foundation in association with Broadcom, is a series of small single-board computers and perhaps the most inspiring computer available today.
Installing Scratch in your Pi
To begin any experiment it is needed to download Scratch in your Pi, how will you? It is very simple as opening Scratch in your Pi browser and download it for your Pi. Now you can do drag and drop programming on your Pi and this gives you numerous different ways to create, change , update different codes . The possibilities are endless

Experiment 10: Blink LED pattern
This experiment will help you to get familiar with the raspberry Pi environment in order to perform common functions. This program to blink LED using Raspberry Pi which covers several GPIO concepts, you can connect different LEDs to different GPIOs and program them to toggle with different intervals to create a pattern
Experiment 11: LEDs, buzzers and Scratch games
In this project you will learn how to wire and control LEDs and buzzers as electronic outputs for a Raspberry Pi using Scratch. You will combine Scratch and physical computing to work with each other to add physical world outputs to on-screen Scratch games.
Experiment 12: Find the Hedge Hog an LED game
Use this experiment to find the hidden hedgehog! In this experiment you will connect the LED of your IOTIF and this LED will glow every time you are close to the hedge hog by this you can soon find the hedge hog. What further? You can add another buzzer or led to toggle whenever you are moving in the wrong direction
Conclusion
As we all know “Internet of Things” is a vast subject it continues to grow and evolve, impacting various aspects of our daily lives and transforming industries. As the technology advances, new applications and possibilities for IoT are constantly emerging so it is a must that one has to develop their knowledge in the field of IOT. IOTIF serves as a great platform for beginning your journey into IOT with its versatility and robust nature will help you throughout your journey. IOTIF can support various programming like for various skill levels from beginners to professionals, from drag and drop programming to Arduino.IDE IOTIF with its easy user interface will support you throughout your learning journey.


